####目录结构
- 一. 准备工作
- 二. 编译
- 2.1、开启相关caffe版本的编译开关配置内容
- 2.2、手动更改或者指定版本对应编译器目录
- 2.3、下载依赖文件dependencies文件到指定目录
- 三. MNIST手写体字符识别(C++)
- 3.1、MNIST数据集下载
- 3.2、转换数据格式
- 3.3、训练和测试数据集
- 3.4、测试单张图片
- 四. Matlab Demo
- 4.1、编译Caffe的Matlab接口
- 4.2、模型文件下载
- 4.3、测试
- 五. 附录
- 5.1、生成网络结构图
- 5.2、相关文件说明
- 5.3、debug调试模式
- 5.4、配置中关于include phase TRAIN/TEST的相关说明
原创文章,转载请注明出处 http://blog.csdn.net/wanggao_1990/article/details/76721294。
一、 准备工作
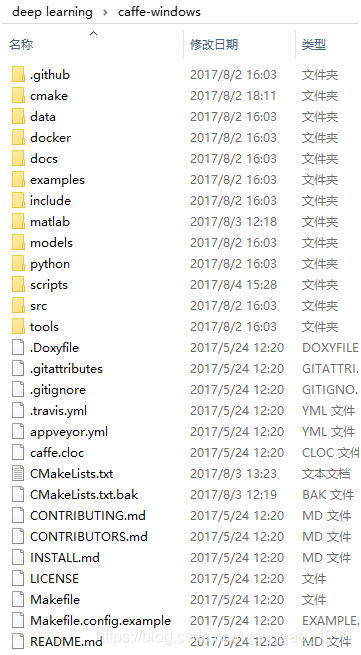
1.1、下载BVLC/Caffe-windows源码,点击跳转下载。
1.2、使用GPU版本,提前安装CUDA 7.5(VS2015使用8.0)、cuDnn v5,Python 2.7或Python3.5 x64
1.3、若要生成Matlab接口,还需要安装Matlab
1.4、搭建环境本次是搭建caffe GPU版本,已经安装VS2015, Python3.5.3 x64, Matlab 2013b, CUDA 8.0,cuDnn v5.1,并生成Matlab接口。
二、 编译
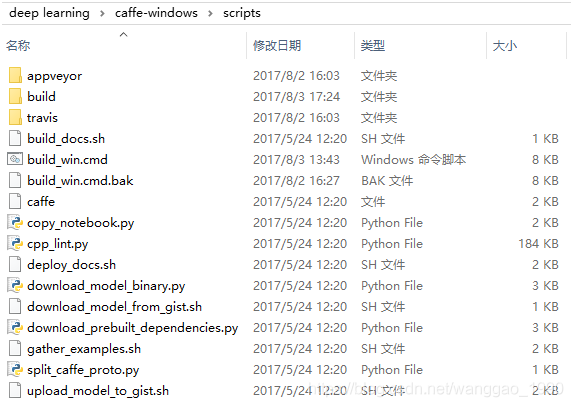
目录.\caffe-windows\scripts\下的build_win.cmd,双击就能在此目录下创建build文件夹并生成VS的.sln解决方案,并编译生成各种版本库和可执行文件。下图是双击.bat后会出现的内容,也会看到相应的一些配置情况。
通常需要改动build_win.cmd文件和相关.cmake文件的部分内容,以修改一些目录和下载内容的配置。目录结构如下。
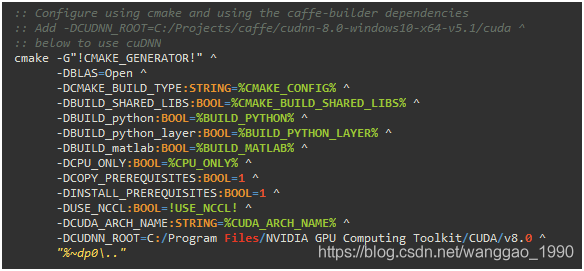
2.1、开启相关caffe版本的编译开关配置内容如下
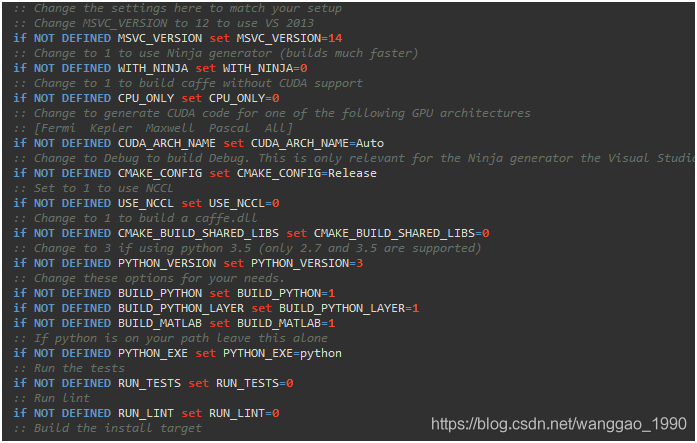
默认VS2015编译,自动检测CUDA,编译GPU版本,生成release等…
例如 ,表示需要编译Matlab版本接口。若不在这里指定,需要编译Matlab版本接口则需要在cmd中给.bat传入参数,如
.\build_win.cmd -DBUILD_matlab=ON。
2.2、手动更改或者指定版本对应编译器目录(VS、Python、Matlab等)
(1)Python 版本是3.5,指定Python对应目录。
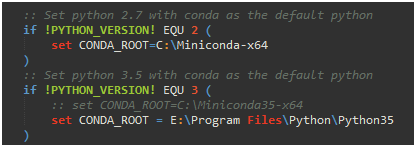
另外,还需要在caffe-windows目录下修改CMakeList.txt中的python版本号set(python_version "3" CACHE STRING "Specify which Python version to use")(python2为默认)。
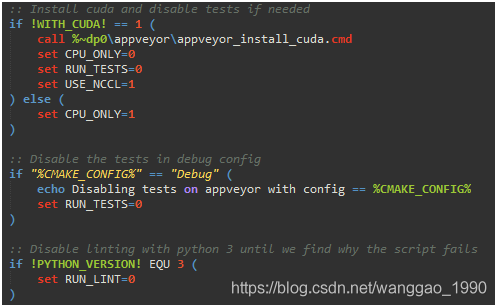
(2)是否编译GPU版本,debug模式下的配置等….

(3)指定编译器,VS2015(或其他VS版本,Ninja)
2.3、提前下载依赖文件dependencies文件到指定目录
在运行build_win.cmd后,会自动执行位于.\caffe-windows\cmake\目录下的WindowsDownloadPrebuiltDependencies.cmake文件(可在文件中找到相关的下载网站),建议手动下载libraries_v140_x64_py35_1.1.0.tar.bz2并解压到到用户目录C:\Users\Administrator\.caffe\dependencies下。
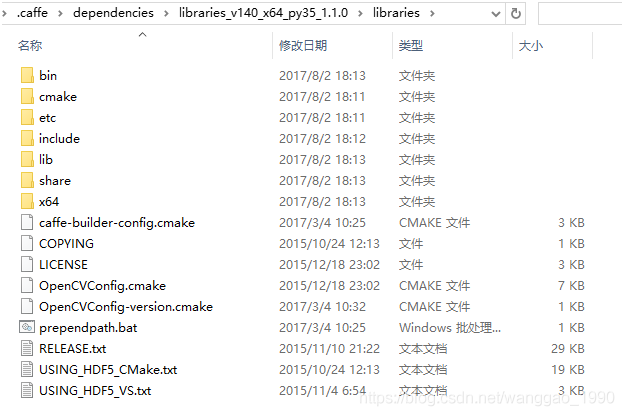
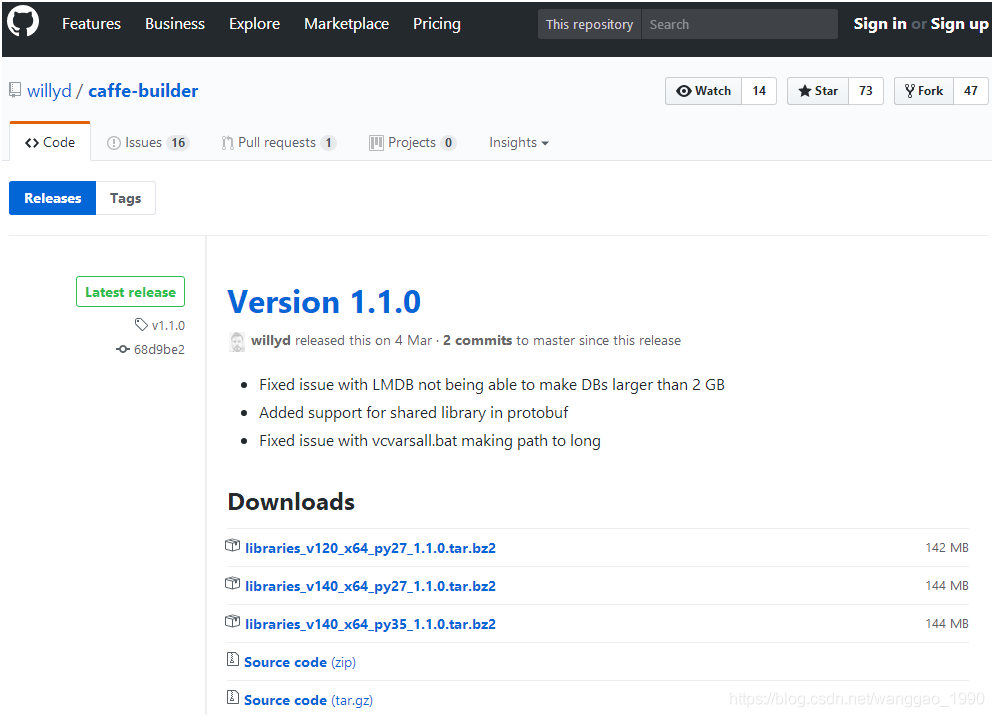
从https://github.com/willyd/caffe-builder/releases下载对应版本的依赖文件并解压到指定位置。
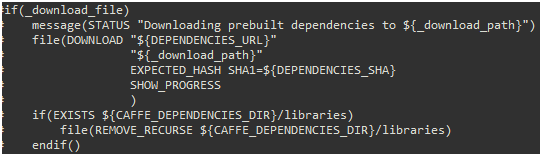
若已经手动下载了,需修改WindowsDownloadPrebuiltDependencies.cmake文件使其不再重复下载,找到如下部分并注释。
2.4、编译
运行build_win.cmd文件,没其他配置问题,等待一段时间就能生成sln和各种文件了。编译生成的caffe.sln解决方案。编译生成的解决方案,生成Matlab、C++、Python不同版本的caffe接口库和samples的数据转换可执行文件。
三、 MNIST手写体字符识别(C++)
利用编译好的C++版本Caffe对MNIST手写字符进行训练和识别。
3.1、MNIST数据集下载
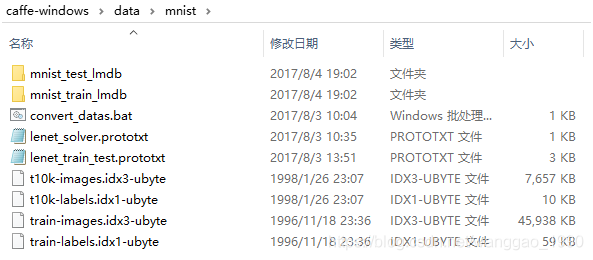
从http://yann.lecun.com/exdb/mnist/下载MNIST的数据集(如下四个压缩文件),并解压到目录.\caffe-windows\data\mnist\下。
[外链图片转存失败,源站可能有防盗链机制,建议将图片保存下来直接上传(img-FcARikAc-1571282551892)(https://github.com/wanggao1990/MarkdownPhotos/blob/master/ImageGithubToMarkdown/windows_caffe-img/3-1-1.png?raw=true)]
3.2、转换数据格式
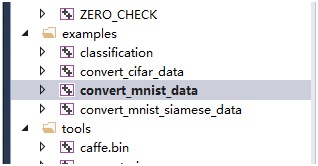
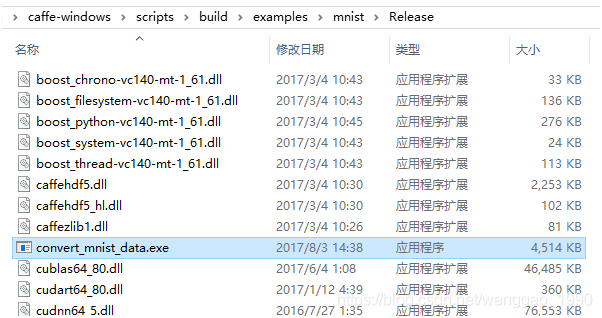
(1)编译"convert_mnist_data"工程,生成convert_mnist_data.exe,位置如右下图。
(2)生成LMBD数据文件
在.\caffe-windows\data\mnist\目录下新建convert_datas.bat批处理文件,内容如下。
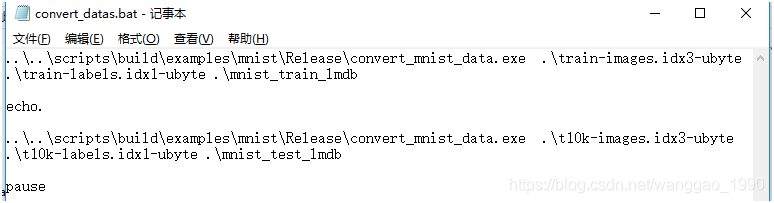
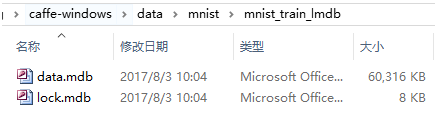
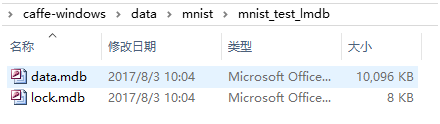
双击后,分别在当前目录下的mnist_train_lmdb和mnist_test_lmdb文件夹下生成数据文件,分别用于训练和测试。运行和生成文件如下:
Tips: 若需要生成levelbd格式,需要在"convert_mnist_data"工程中先指定backend为”leveldb”,再编译生成exe,重复执行上述操作即可。

3.3、训练和测试数据集
(1)准备prototxt文件
首先从.\caffe-windows\examples\mnist\目录下拷贝lenet_solver.prototxt和lenet_train_test.prototxt两个文件到.\caffe-windows\data\mnist\目录下。
修改两个文件的数据源路径和生成模型文件路径,内容如下:
如果数据格不为LMBD,还需修改data_param下的backend为对应格式的字符(文件说明见附录)。
(2)训练数据集,生成.caffemodel模型
在.\caffe-windows\data\mnist\目录新建snapshot_lenet文件夹。新建train.bat文件,内容如下。

运行得到如下结果。
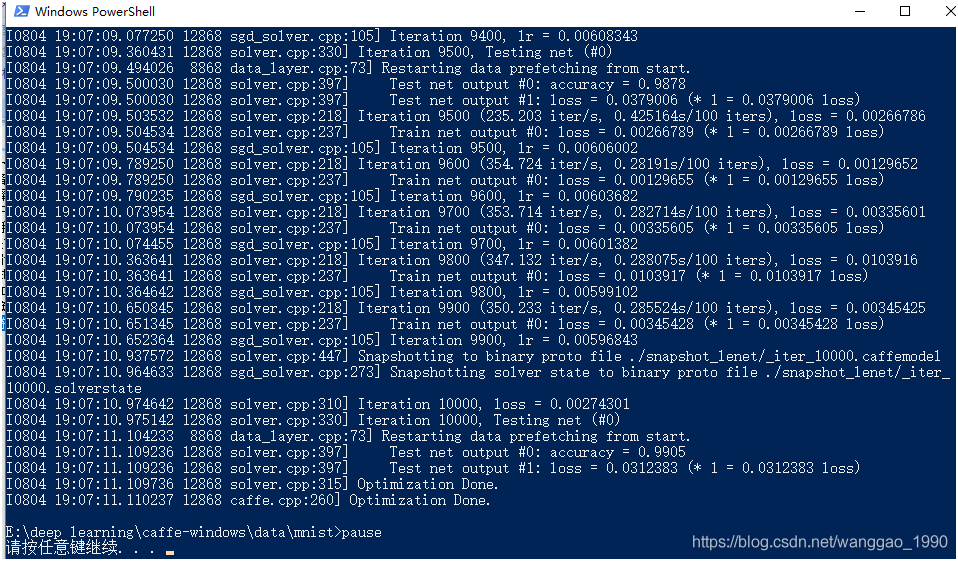
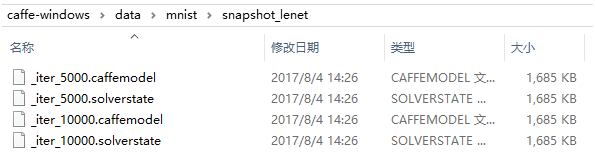
利用GPU训练迭代10000次,最终的准确率为99.05%。生成的模型文件:
(3)测试数据集
在.\caffe-windows\data\mnist\新建test.bat文件,内容如下。

运行得到结果如下,正确率为98.58%。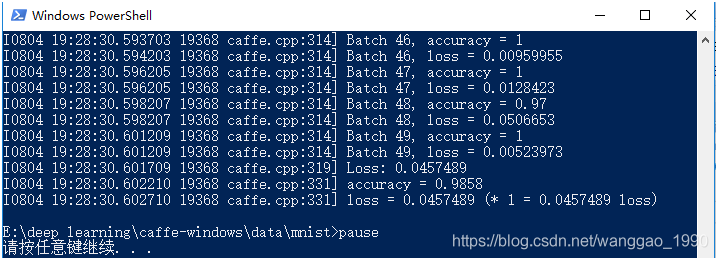
3.4、测试单张图片
测试识别单张图片,准备一张28*28的数字手写体图片文件。另外,还需要数据训练的均值文件、标签文件、deploy.prototxt文件和识别可执行文件。
(1)生成均值文件mean.binaryproto
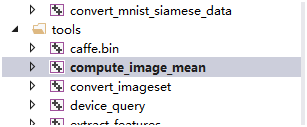
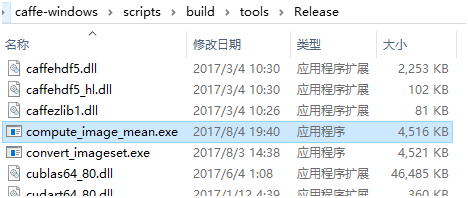
编译“compute_image_mean”工程,生成对应的exe文件,位置如右下图
在.\caffe-windows\data\mnist\新建compute_mean.bat文件,内容如下。
运行后会在当前目录下生成一个mean.binaryproto均值文件。
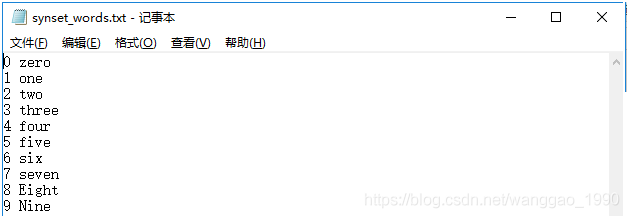
(2)类别标签文件synset_words.txt
在.\caffe-windows\data\mnist\新建synset_words.txt文件,内容如下
(3)生成测试工具可执行文件
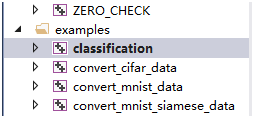
编译“classification”工程,生成对应的exe文件,位置如右下图
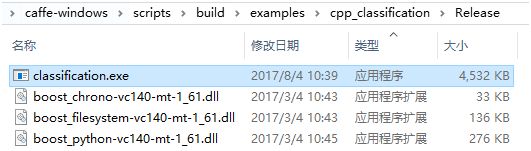
(4)deploy.prototxt文件
该文件由lenet_train_test.prototxt修改而来,可从目录.\caffe-windows\examples\mnist\下直接拷贝文件lenet.prototxt到当前目录,并改名为deploy.prototxt。
(5)测试单张图片
在.\caffe-windows\data\mnist\新建mnist_img_classification.bat文件,内容如下
测试图片3.bmp位于当前文件夹下,图片和测试结果如下:

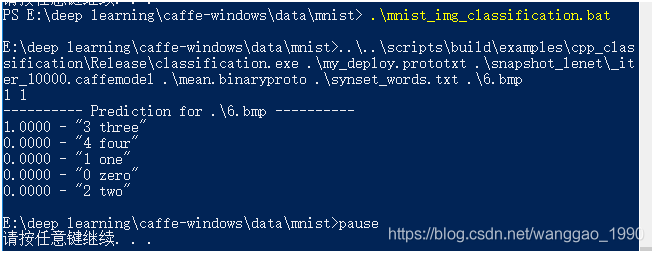
能够正确识别为数字3 (注意,图片背景为黑,前景为白)。
Tips:
测试当个模型的时候用到了均值文件,建议在训练文件lenet_train_test.prototxt和测试文件deploy.prototxt中transform_param添加处理命令mean_file: "./mean.binaryproto"。
四、 Matlab Demo
利用CaffeNet演示图像分类,首先需要编译Caffe的Matlab接口,再下载一个对应的模型文件,最后就可以运行这个demo。
4.1、编译Caffe的Matlab接口
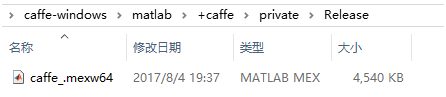
编译“matlab”工程,生成对应的caffe_.mexw64文件,位置如右下图
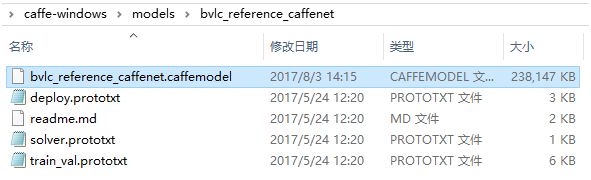
4.2、模型文件下载
从http://dl.caffe.berkeleyvision.org/bvlc_reference_caffenet.caffemodel下载模型文件,并放到\caffe-windows\models\bvlc_reference_caffenet\文件夹下。
4.3、测试
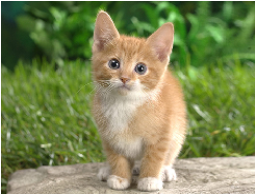
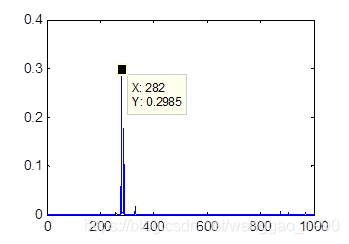
打开Matlab,设置当前目录为.\caffe-windows\matlab\demo\,执行以下代码:
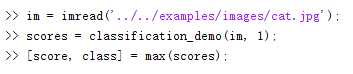
图片和结果如下:
五、 附录
5.1、生成网络结构图
利用.\caffe-windows\python目录下的draw_net.py脚本绘制网络结构图(需要pip安装依赖的包,见requirements.txt)。新建draw_net.bat批处理文件,内容如下。复制lenet_train_test.prototxt到当前目录。

运行后结果如下

对my_deploy.prototxt生成结构图如下
Tips: 可查看大图。 网络结构是从下向上生长,当前层的前一层为bottom,后一层是top。
5.2、相关文件说明
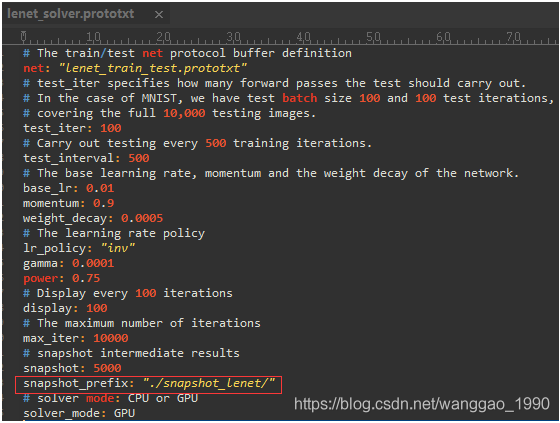
(1)lenet_solver.prototxt
net: " lenet_train_test.prototxt" (网络配置文件位置)
test_iter: 100 (测试batch_size=100, 100次测试能覆盖完整的10000个样本)
test_interval: 500 (每训练500次进行一次测试)
base_lr: 0.01 (基础学习率)
momentum: 0.9 (动量)
weight_decay: 0.0005 (权重衰减)
lr_policy: "inv" (inv: return base_lr * (1 + gamma * iter) ^ (- power))
gamma: 0.0001
power: 0.75
display: 100() (每迭代100次打印结果)
max_iter: 10000 (最大迭代次数)
snapshot: 5000 (5000次迭代保存一次临时模型,名称为lenet_iter_5000.caffemodel)
snapshot_prefix: "examples/mnist/lenet"
solver_mode: GPU (GPU开关)
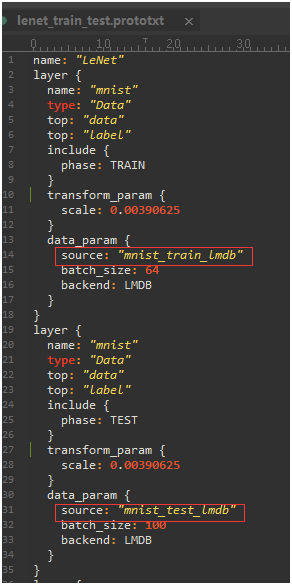
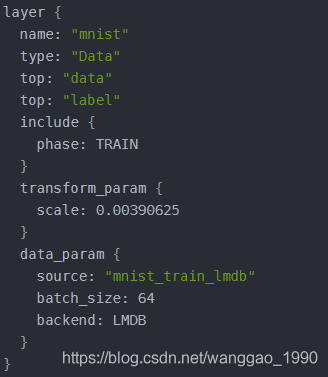
(2)lenet_train_test.prototxt
name: "LeNet" 网络名
layer {
name: "mnist" 本层名称
type: "Data" 层类型
top: "data" 下一层接口
top: "label" 下一层接口
include {
phase: TRAIN
}
transform_param {
scale: 0.00390625 #1/256,预处理如减均值,尺寸变换,随机剪,镜像等
}
data_param {
source: "mnist_train_lmdb" 训练数据位置
batch_size: 64 一次训练的样本数
backend: LMDB 读入的训练数据格式,默认lmdb
}
}
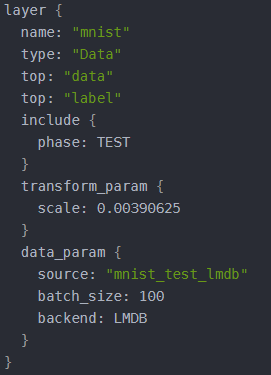
layer {
name: "mnist"
type: "Data"
top: "data"
top: "label"
include {
phase: TEST
}
transform_param {
scale: 0.00390625
}
data_param {
source: "mnist_test_lmdb"
batch_size: 100 一次测试使用100个数据
backend: LMDB
}
}
layer {
name: "conv1"
type: "Convolution" 卷积层
bottom: "data" 上一层名“data”
top: "conv1" 下一层接口“conv1”
param {
lr_mult: 1 (weights的学习率与全局相同)
}
param {
lr_mult: 2 (biases的学习率是全局的2倍)
}
convolution_param {
num_output: 20 卷积核20个
kernel_size: 5 卷积核尺寸5×5
stride: 1 步长1
weight_filler {
type: "xavier" (随机的初始化权重和偏差)
}
bias_filler {
type: "constant" bias用0初始化
}
}
}
layer {
name: "pool1"
type: "Pooling" 池化层
bottom: "conv1" 上层“conv1”
top: "pool1" 下层接口“pool1”
pooling_param {
pool: MAX 池化函数用MAX
kernel_size: 2 池化核函数大小2×2
stride: 2 步长2
}
}
layer {
name: "conv2"
type: "Convolution"
bottom: "pool1"
top: "conv2"
param {
lr_mult: 1
}
param {
lr_mult: 2
}
convolution_param {
num_output: 50 卷积核50个
kernel_size: 5
stride: 1
weight_filler {
type: "xavier"
}
bias_filler {
type: "constant"
}
}
}
layer {
name: "pool2"
type: "Pooling"
bottom: "conv2"
top: "pool2"
pooling_param {
pool: MAX
kernel_size: 2
stride: 2
}
}
layer {
name: "ip1"
type: "InnerProduct" 全连接层
bottom: "pool2" 上层连接“pool2”
top: "ip1" “下层输出接口ip1”
param {
lr_mult: 1
}
param {
lr_mult: 2
}
inner_product_param {
num_output: 500 输出数量500
weight_filler {
type: "xavier"
}
bias_filler {
type: "constant"
}
}
}
layer {
name: "relu1"
type: "ReLU" 激活函数
bottom: "ip1"
top: "ip1" (这个地方还是ip1,底层与顶层相同减少开支,下一层全连接层的输入也还是ip1)
}
layer {
name: "ip2"
type: "InnerProduct"
bottom: "ip1"
top: "ip2"
param {
lr_mult: 1
}
param {
lr_mult: 2
}
inner_product_param {
num_output: 10 输出结果10个
weight_filler {
type: "xavier"
}
bias_filler {
type: "constant"
}
}
}
layer {
name: "accuracy"
type: "Accuracy"
bottom: "ip2" 上层连接ip2全连接层
bottom: "label" 上层连接label层
top: "accuracy" 输出接口为accuracy
include {
phase: TEST
}
}
layer {
name: "loss"
type: "SoftmaxWithLoss" 损失函数
bottom: "ip2"
bottom: "label"
top: "loss"
}
(3)lenet.prototxt
name: "LeNet"(网络的名字)
layer {
  name: "data"
  type: "Input"				(层类型,输入)
  top: "data"				(导入数据这一层没有bottom,因为是第一层)
  input_param {
	  shape: { dim: 64 dim: 1 dim: 28 dim: 28 }
	}	                   (64张图为一批,28*28大小)
}
读取这批数据维度:64 1 28 28

layer {
  name: "conv1"
  type: "Convolution"	(卷积类型层)
  bottom: "data"		(上一层名叫做data)
  top: "conv1"			(下一层名叫做conv1)
  param {
    lr_mult: 1			(weights的学习率与全局相同)
  }
  param {
    lr_mult: 2			(biases的学习率是全局的2倍)
  }
  convolution_param	{   (卷积操作参数设置)
    num_output: 20		(卷积输出数量20,由20个特征图Feature Map构成)
    kernel_size: 5		(卷积核的大小是5*5)
    stride: 1			(卷积操作步长)
    weight_filler {
      type: "xavier"	(随机的初始化权重和偏差)
    }
    bias_filler {
      type: "constant"	(bias使用0初始化)
    }
  }				(通过卷积之后,数据变成(28-5+1)*(28-5+1),20个特征)
}
卷积之后这批数据维度:64 20 24 24

layer {
  name: "pool1"
  type: "Pooling"			(下采样类型层)
  bottom: "conv1"
  top: "pool1"
  pooling_param {
    pool: MAX			(下采样方式,取最大值)
    kernel_size: 2			(下采样核函数size)
    stride: 2				(步长)
  }
}
下采样之后这批数据维度:64 20 12 12

layer {
  name: "conv2"
  type: "Convolution"
  bottom: "pool1"
  top: "conv2"
  param {
    lr_mult: 1
  }
  param {
    lr_mult: 2
  }
  convolution_param {
    num_output: 50			(50个卷积核)
    kernel_size: 5
    stride: 1
    weight_filler {
      type: "xavier"
    }
    bias_filler {
      type: "constant"
    }
  }
}
卷积之后这批数据维度:64 50 8 8

layer {
  name: "pool2"
  type: "Pooling"
  bottom: "conv2"
  top: "pool2"
  pooling_param {
    pool: MAX
    kernel_size: 2
    stride: 2
  }
}
下采样之后这批数据维度:64 50 4 4

layer {
  name: "ip1"
  type: "InnerProduct"		(全连接类型层)
  bottom: "pool2"
  top: "ip1"
  param {
    lr_mult: 1
  }
  param {
    lr_mult: 2
  }
  inner_product_param {		(全连接层参数设置)
    num_output: 500			(输出为500)
    weight_filler {
      type: "xavier"
    }
    bias_filler {
      type: "constant"
    }
  }				(4*4的数据通过4*4的卷积得到1*1的数据)
}
通过全连接层之后这批数据维度:64 500 1 1

layer {
  name: "relu1"
  type: "ReLU"		(激活函数类型层)
  bottom: "ip1"
  top: "ip1"	(这个地方还是ip1,底层与顶层相同减少开支,下一层全连接层的输入也还是ip1)
}
通过ReLU层之后这批数据维度:64 500 1 1(不做改变)

layer {
  name: "ip2"
  type: "InnerProduct"
  bottom: "ip1"
  top: "ip2"
  param {
    lr_mult: 1
  }
  param {
    lr_mult: 2
  }
  inner_product_param {
    num_output: 10			(直接输出结果,0-9,十个数字所以维度是10)
    weight_filler {
      type: "xavier"
    }
    bias_filler {
      type: "constant"
    }
  }				            (数据的分类判断在这一层中完成)
}
通过全连接层之后这批数据维度:64 10 1 1


layer {
  name: "prob"
  type: "Softmax"			(损失函数)
  bottom: "ip2"
  top: "prob"				(一开始数据输入为date的话,这里写label)
}
5.3 Debug调试模式
当我们想进入debug模式进行调试代码时,切换方案配置为Debug,点击build时,会提示找不到python*.lib。正常情况下,debug也是应该找python*_d.lib的。问过caffe的作者,回答为:
Usually official python builds do not include the debug library. Python.h inserts a linker directive for the python35_d.lib in debug and python35.lib in release but boost.python tries to fool python.h so that it links to python35.lib since most people won’t have python35_d.lib. If you want to use the debug library define BOOST_DEBUG_PYTHON see: http://www.boost.org/doc/libs/1_61_0/boost/python/detail/wrap_python.hpp。
另外,wrap_python.hpp的开头注释中也写到 This file serves as a wrapper around “Python.h" which allows it to be compiled with GCC 2.95.2 under Win32 and which disables the default MSVC behavior so that a program may be compiled in debug mode without requiring a special debugging build of the Python library.
解决办法:
打开 .caffe\dependencies\libraries_v140_x64_py35_1.1.0\libraries\include\boost-1_61\boost\python\detail\下的wrap_python.hpp文件,添加一句#define BOOST_DEBUG_PYTHON,修改如下。之后便能在debug下编译成功。
#ifdef _DEBUG
#define BOOST_DEBUG_PYTHON
# ifndef BOOST_DEBUG_PYTHON
#  ifdef _MSC_VER
5.4 配置中关于include phase TRAIN/TEST的相关说明
prototxt文件一般会有2个或3个, 2个时为 train_val.prototxt 和 deploy.prototxt, 3个时为 train.prototxt,val.prototxt 和 deploy.prototxt 。
其中deploy.prototxt不用解释,通常会是 train_val.prototxt ,这个里面就存在以下两种参数:
include {
      phase: TRAIN
}

include {
      phase: TEST
}
这两种参数分别配置训练train和验证validation, 多数多出现在 Data 和 Accuracy 层,供模型有区别地选择当前层的配置。
(1) Data层
例如train_val.prototxt 中有2个Data层,如下图,在训练时使用目录mnist_train_lmdb下的数据集,在测试时使用目录mnist_test_lmdb下的数据。
如果训练和测试的样本一样,有两种使用方式:
第一种,保留两个data层,data_param中source使用同一个数据;
第二种,去掉include { phase: xxx}, 使用默认方式,默认的data_param中source既用在训练train,也用在验证validation中。
注意,指定phase时,必须有2个,若仅保留TRAIN,会报错误 F1017 11:17:45.960036 15712 insert_splits.cpp:29] Unknown bottom blob ‘data’ (layer ‘conv1’, bottom index 0), 提示bottom层既data层不存在。
(2) Accuracy层
当phase为TEST时,仅在指定如
test_iter: 100
test_interval: 500
时,accuracy仅出现在验证过程中。
layer {
  name: "accuracy"
  type: "Accuracy"
  bottom: "ip2"
  bottom: "label"
  top: "accuracy"
  include {
    phase: TEST
  }
}
选择第500次迭代,会多出一部分有 Test net ouput #0 accuracy 和 #1 loss。其他次迭代仅有一个 Train net outpu #0的loss。
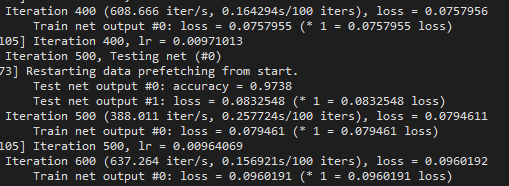
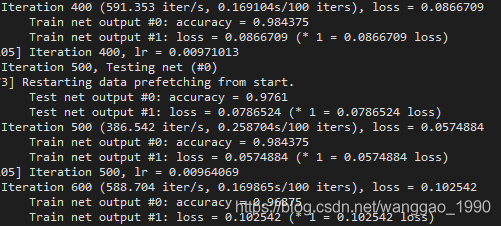
若去掉 include { phase: TEST } , 则默认为训练和测试都进行验证。训练过程是每个迭代都计算accuracy,测试保持为每500迭代一次。截图分别如下。
原创文章,转载请注明出处 http://blog.csdn.net/wanggao_1990/article/details/76721294。
cs