本文实例为大家分享了opencv实现图像几何变换的具体代码,供大家参考,具体内容如下
图像伸缩(cv2.resize)
图像的扩大与缩小有专门的一个函数,cv2.resize(),那么关于伸缩需要确定的就是缩放比例,可以是x与y方向相同倍数,也可以单独设置x与y的缩放比例。另外一个就是在缩放以后图像必然就会变化,这就又涉及到一个插值问题。那么这个函数中,缩放有几种不同的插值(interpolation)方法,在缩小时推荐cv2.INTER_ARER,扩大是推荐cv2.INTER_CUBIC和cv2.INTER_LINEAR。默认都是cv2.INTER_LINEAR,比如:
import cv2
import matplotlib.pyplot as plt

img = cv2.imread('d:/1.jpg')
# 插值:interpolation
# None本应该是放图像大小的位置的,后面设置了缩放比例,
#所有就不要了
res1 = cv2.resize(img,None,fx=2,fy=2,interpolation=cv2.INTER_CUBIC)
#直接规定缩放大小,这个时候就不需要缩放因子
height,width = img.shape[:2]
res2 = cv2.resize(img,(2*width,2*height),interpolation=cv2.INTER_CUBIC)
plt.subplot(131)
plt.imshow(img)
plt.subplot(132)
plt.imshow(res1)
plt.subplot(133)
plt.imshow(res2)
plt.show()

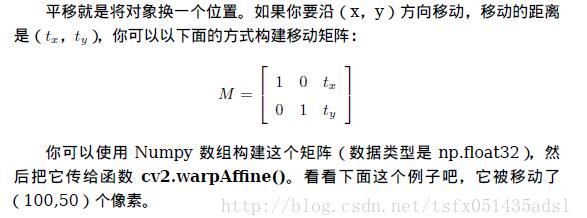
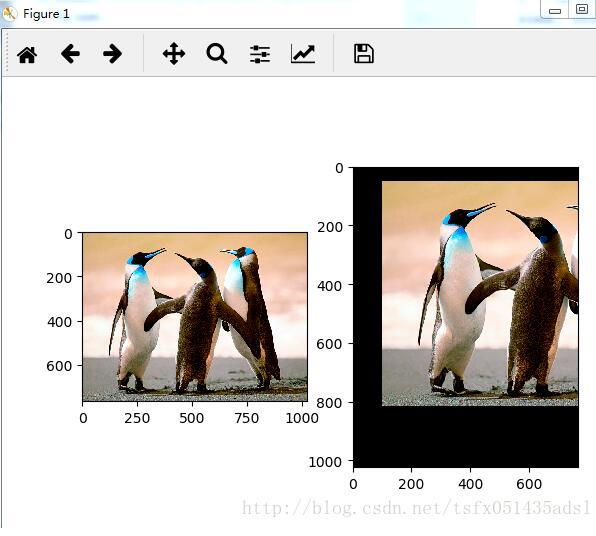
图像平移(cv2.warpAffine)
import cv2
import numpy as np
import matplotlib.pyplot as plt

img = cv2.imread('d:/1.jpg')
H = np.float32([[1, 0, 100], [0, 1, 50]])
rows, cols = img.shape[:2]
res = cv2.warpAffine(img, H, (rows, cols)) # 需要图像、变换矩阵、变换后的大小
plt.subplot(121)
plt.imshow(img)
plt.subplot(122)
plt.imshow(res)
plt.show()
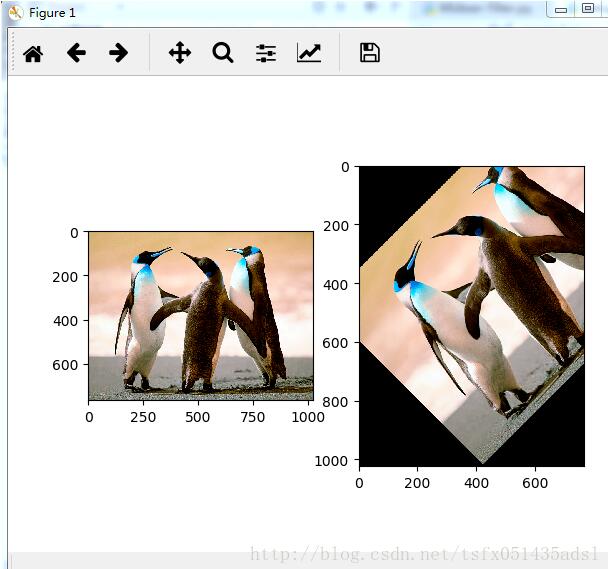
图像旋转(逆时针旋转,cv2.warpAffine和cv2.getRotationMatrix2D)
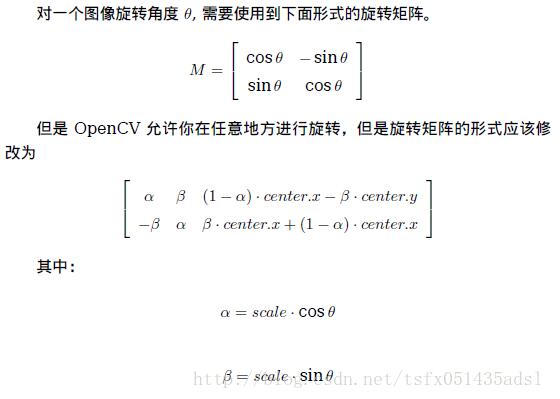
为了构造这个矩阵,opencv提供了一个函数:
cv2.getRotationMatrix2D(),这个函数需要三个参数,旋转中心,旋转角度,旋转后图像的缩放比例,比如下例:
import cv2
 import matplotlib.pyplot as plt

 img = cv2.imread('d:/1.jpg')
 rows, cols = img.shape[:2]
 # 第一个参数旋转中心,第二个参数旋转角度,第三个参数:缩放比例
 M = cv2.getRotationMatrix2D((cols / 2, rows / 2), 45, 1)
 # 第三个参数:变换后的图像大小
 res = cv2.warpAffine(img, M, (rows, cols))

 plt.subplot(121)
 plt.imshow(img)
 plt.subplot(122)
 plt.imshow(res)
 plt.show()
js