当前位置 博文首页 > 金陵小白:MySQL菜鸟实录(一):MySQL服务安装实战

    金陵小白:MySQL菜鸟实录(一):MySQL服务安装实战

    作者:金陵小白 时间:2021-02-08 12:28

    【引言】于个人而言,MySQL虽然用了这么多年,但细思量却真的是个熟悉又陌生的领域,说熟悉是因为从刚开始做开发就接触到它,说陌生实则这么多年,对MySQL或者说数据库这个领域还是有些微微的畏惧心理,说到底还是因为不熟,没把握!技术这东西,一点都偷不得懒,你投入多少,它才会回报你多少;所以这就从菜鸟开始慢慢练起来吧!

    CentOS 7

    基本信息

    • 系统版本: CentOS 7.3 64bit
    • 系统配置: 4vCPUs | 8GB
    • 磁盘空间:
    [root@ecs-ce5a-0001 ~]# df -h
    Filesystem      Size  Used Avail Use% Mounted on
    /dev/vda1        40G   17G   22G  44% /
    devtmpfs        3.9G     0  3.9G   0% /dev
    tmpfs           3.9G     0  3.9G   0% /dev/shm
    tmpfs           3.9G   25M  3.8G   1% /run
    tmpfs           3.9G     0  3.9G   0% /sys/fs/cgroup
    tmpfs           783M     0  783M   0% /run/user/0
    /dev/vdb1       493G   70M  467G   1% /data
    [root@ecs-ce5a-0001 ~]# 
    

    检查历史残留

    ??使用rpm查询功能,查询本机是否有安装过MySQL(因为安装过后如果不彻底卸载的话,会导致后续安装出现一些异常问题,所以为了保险起见还是先检查一下为好):

    # 没有装过MySQL的主机
    [root@ecs-ce5a-0001 ~]# rpm -qa|grep -i mysql
    [root@ecs-ce5a-0001 ~]# 
    
    # 之前装过MySQL的主机
    [root@mserver0002 img]#  rpm -qa|grep -i mysql
    mysql-community-common-5.7.24-1.el6.x86_64
    mysql-community-client-5.7.24-1.el6.x86_64
    mysql-community-libs-5.7.24-1.el6.x86_64
    mysql-community-server-5.7.24-1.el6.x86_64
    [root@mserver0002 img]#
    

    ??若发现有历史安装痕迹,那么就要进行下一步的清理操作来清除历史垃圾了,挨个将所有的安装包清理完毕(若出现卸载不掉的可以尝试使用rpm -ev ):

    [root@mserver0002 img]#  yum -y remove mysql-community-common-5.7.24-1.el6.x86_64
    [root@mserver0002 img]#  yum -y remove xxx
    

    下载安装源

    ??MySQL有个安装源仓库站: http://repo.mysql.com/ ;里面有一大排的安装源链接,这时候可不能找错了,对应于我们此次安装的CentOS7.3版本我们选用带el7的源: http://repo.mysql.com/mysql57-community-release-el7-9.noarch.rpm ;这一步切记千万不能大意,下载的版本一旦和系统无法对应,那么接下来的所有操作都是白费工夫,而且还有可能遇到一些意想不到的问题。

    [root@ecs-ce5a-0001 ~]# cd tmp/
    [root@ecs-ce5a-0001 tmp]# ls
    [root@ecs-ce5a-0001 tmp]# wget http://repo.mysql.com/mysql57-community-release-el7-9.noarch.rpm 
    --2018-11-14 10:29:03--  http://repo.mysql.com/mysql57-community-release-el7-9.noarch.rpm
    ......
    2018-11-14 10:29:04 (253 MB/s) - ‘mysql57-community-release-el7-9.noarch.rpm’ saved [9224/9224]
    [root@ecs-ce5a-0001 tmp]# 
    

    安装mysql-server

    ??在经过上一步将安装源下载到本地之后,接下来就是安装了;先通过rpm将安装源安装后,就可以正式使用yum进行mysql-server的安装了(据说也可以在安装时指定installroot,没有尝试过,一般都是默认安装的),有需要确认的地方之间y就可以了;直至出现“Complete!”意味着安装顺利完成了。

    [root@ecs-ce5a-0001 tmp]# rpm -ivh mysql57-community-release-el7-9.noarch.rpm 
    warning: mysql57-community-release-el7-9.noarch.rpm: Header V3 DSA/SHA1 Signature, key ID 5072e1f5: NOKEY
    Preparing...                          ################################## [100%]
    Updating / installing...
       1:mysql57-community-release-el7-9  ################################# [100%]
    [root@ecs-ce5a-0001 tmp]# 
    [root@ecs-ce5a-0001 tmp]# yum -y install mysql-server 
    Loaded plugins: fastestmirror
    Determining fastest mirrors
    ......
    
    Replaced:
      mariadb-libs.x86_64 1:5.5.60-1.el7_5 
    
    Complete!
    [root@ecs-ce5a-0001 tmp]# 
    

    默认配置查看

    ??默认情况下,安装后的配置文件是下面这样子的(我们可以根据自己的需要将相应的配置补充或者进行修改,比如datadir一般都会设置到专属的数据目录下面去):

    [root@ecs-ce5a-0001 tmp]# vim /etc/my.cnf
    
    [mysqld]
    # ... some comments
    datadir=/var/lib/mysql
    socket=/var/lib/mysql/mysql.sock
    
    # Disabling symbolic-links is recommended to prevent assorted security risks
    symbolic-links=0
    
    log-error=/var/log/mysqld.log
    pid-file=/var/run/mysqld/mysqld.pid
    

    启动服务

    ??启动MySQL服务,当前版本的MySQL在启动时会默认生成一个root用户并提供默认密码,我们可以在/var/log/mysqld.log 文件中获取到默认密码,至此服务正常启动完成,并获取到了默认的root密码。

    [root@ecs-ce5a-0001 tmp]# service mysqld restart
    Redirecting to /bin/systemctl restart mysqld.service
    [root@ecs-ce5a-0001 tmp]# 
    [root@ecs-ce5a-0001 tmp]# grep password /var/log/mysqld.log 
    2018-11-14T03:07:28.036081Z 1 [Note] A temporary password is generated for root@localhost: 8-8br-HfR4J9
    [root@ecs-ce5a-0001 tmp]# 
    

    修改密码和赋权

    ??使用默认密码登录后,发现啥也做不了,必须修改密码,所以使用了alter来进行密码修改(密码要求比早版本的严格了很多,长度、特殊字符、字母和数字都有要求),关于赋权,后面的补充知识里面会专门稍微详细的说明一下。

    [root@ecs-ce5a-0001 tmp]# mysql -uroot -p8-8br-HfR4J9
    mysql: [Warning] Using a password on the command line interface can be insecure.
    ......
    mysql> use mysql
    ERROR 1820 (HY000): You must reset your password using ALTER USER statement before executing this statement.
    mysql> alter user 'root'@'localhost' identified by 'smart';  
    ERROR 1819 (HY000): Your password does not satisfy the current policy requirements
    mysql> alter user 'root'@'localhost' identified by 'Smart@123';
    Query OK, 0 rows affected (0.00 sec)
    
    mysql> flush privileges;
    Query OK, 0 rows affected (0.00 sec)
    
    mysql> 
    

    CentOS 6

    无果的尝试

    ??理论上来说,CentOS6和CentOS7安装MySQL的步骤应该是一致的,起码大部分的步骤都应该是一致的,但是事实上却并不如此。
    ??按照传统的安装方式,即使在下载repo时选择了正确的平台版本,最后发现还是在yum -y install mysql-server 这一步遇到了缺GLIBC_2.14的问题(类似下面这种),也曾经尝试过自己编译安装这个库,但是没有成功,既然此路不通,那何不另觅新法呢!

    Error: Package: mysql-community-libs-5.7.17-1.el7.x86_64 (mysql57-community-dmr)
               Requires: libc.so.6(GLIBC_2.14)(64bit)
    Error: Package: mysql-community-client-5.7.17-1.el7.x86_64 (mysql57-community-dmr)
               Requires: libc.so.6(GLIBC_2.14)(64bit)
    Error: Package: mysql-community-client-5.7.17-1.el7.x86_64 (mysql57-community-dmr)
               Requires: libstdc++.so.6(GLIBCXX_3.4.15)(64bit)
     You could try using --skip-broken to work around the problem
    

    另谋出路

    ??既然在线安装会出问题,那么不妨试试传统的安装方式,把安装包下载到本地再手动安装呢?
    ??于是就找到满足我们系统要求的版本(下载地址: https://dev.mysql.com/downloads/file/?id=481078 ),下载到本地(文件名:mysql-5.7.24-1.el6.x86_64.rpm-bundle.tar,这里的el6就是适配CentOS6的);压缩包里有如下一堆文件:

    Administrator@IVF21BBAA9XWLKD MINGW64 /e/暂时存放/mysql-5.7.24-1.el6.x86_64.rpm-bundle
    $ ls
    mysql-community-client-5.7.24-1.el6.x86_64.rpm
    mysql-community-common-5.7.24-1.el6.x86_64.rpm
    mysql-community-devel-5.7.24-1.el6.x86_64.rpm
    mysql-community-embedded-5.7.24-1.el6.x86_64.rpm
    mysql-community-embedded-devel-5.7.24-1.el6.x86_64.rpm
    mysql-community-libs-5.7.24-1.el6.x86_64.rpm
    mysql-community-libs-compat-5.7.24-1.el6.x86_64.rpm
    mysql-community-server-5.7.24-1.el6.x86_64.rpm
    mysql-community-test-5.7.24-1.el6.x86_64.rpm
    

    ??接下来就分别按顺序安装common、libs、client、server四个包(其他工具包可以视情况决定是否安装);这里的四个包也是可以一次性安装的(命令如:rpm -ivh pkg1 pkg2 pkg3 pkg4):

    [root@mserver0002 img]# rpm -ivh mysql-community-common-5.7.24-1.el6.x86_64.rpm
    [root@mserver0002 img]# rpm -ivh mysql-community-libs-5.7.24-1.el6.x86_64.rpm
    [root@mserver0002 img]# rpm -ivh mysql-community-client-5.7.24-1.el6.x86_64.rpm
    [root@mserver0002 img]# rpm -ivh mysql-community-server-5.7.24-1.el6.x86_64.rpm
    

    ??安装完成后,后面的操作步骤就和CentOS7没什么差异了,无非是改改配置文件,设置密码和权限之类的操作了。

    Ubuntu 16

    先说两句

    ??早几年Ubuntu的系统使用的还是挺多的,但是如今很多应用默认都是使用CentOS了,其实孰优孰劣我还真没详细比较过,不过一个比较明显的感觉呢,Ubuntu安装软件比起CentOS好像是比较简便一些,更傻瓜式一点,所以都了解一下也没什么坏处。

    实际操作

    ??鉴于下载安装个系统还是要耗费不少精力,所以这次也就偷个小懒,没有实际去验证这个操作了,但是之前因为已经装过很多次Ubuntu环境的MySQL了,结合网上的一些博客说明,大致也就以下几个步骤:

    # 先通过如下3条命令完成安装
    sudo apt-get install mysql-server
    sudo apt install mysql-client
    sudo apt install libmysqlclient-dev
    
    # 然后查看一下mysql的端口监听确认服务是否正常启动
    sudo netstat -tap | grep mysql
    

    ??安装到这里就已经算成功了,后面的步骤又是老调重弹了(配置、密码、权限等等),所以也就不多说了。

    Windows 10

    安装版

    ??貌似在5.5或之前的版本还挺流行安装的,无非是一步步next,到最后设置个root密码,然后就万事大吉;到现在比较新的发行版好像都流行使用免安装的方式了,而且安装版的操作实际上也是小学生级的,只要稍微熟悉电脑操作的,估计装起来都不会遇到啥问题,所以这里就不多说了。
    ??安装版(MSI)的下载地址: https://dev.mysql.com/downloads/windows/installer/8.0.html 。

    免安装版

    下载安装源

    ??参考地址: https://dev.mysql.com/downloads/file/?id=480557 ; 下载到本地:mysql-8.0.13-winx64.zip。

    解压安装

    ??将压缩包解压到某个目录下(这里我是在虚拟机里面安装的,所以直接放在C盘根目录下了);然后以管理员权限运行CMD,进入mysql解压目录的bin。
    ??到这里理论上来说是要配置一下my.ini文件的(也就是Linux版的my.cnf文件),鉴于这次只是做简单的安装实验,所以就略去这一步操作。
    ??接下来在dos窗口运行mysqld --initialize-insecure(注意:这里有坑,参考文章最后的常见错误提供了解决方法)
    ??然后就可以install和start了,出现下面的成功日志即表示服务已经成功启动了。

    Microsoft Windows [版本 10.0.10240]
    (c) 2015 Microsoft Corporation. All rights reserved.
    
    C:\Windows\system32>cd ../../
    
    C:\>cd mysql-8.0.13-winx64
    
    C:\mysql-8.0.13-winx64>cd bin
    
    C:\mysql-8.0.13-winx64\bin>mysqld --initialize-insecure
    
    C:\mysql-8.0.13-winx64\bin>mysqld -install
    Service successfully installed.
    
    C:\mysql-8.0.13-winx64\bin>net start mysql
    MySQL 服务正在启动 ..
    MySQL 服务已经启动成功。
    
    C:\mysql-8.0.13-winx64\bin>


    安装结果验证

    ??在前面的安装操作中我们一直没有设置root密码,所以在验证之前我们要设置一下root密码,按照下面的步骤操作即可;密码设置完成后即可登录进行常规操作,如下即表示安装成功。

    C:\mysql-8.0.13-winx64\bin>mysqladmin -u root password Smart@123
    mysqladmin: [Warning] Using a password on the command line interface can be insecure.
    Warning: Since password will be sent to server in plain text, use ssl connection to ensure password safety.
    
    
    C:\mysql-8.0.13-winx64\bin>mysql -uroot -p
    Enter password: *********
    Welcome to the MySQL monitor.  Commands end with ; or \g.
    Your MySQL connection id is 10
    Server version: 8.0.13 MySQL Community Server - GPL
    
    Copyright (c) 2000, 2018, Oracle and/or its affiliates. All rights reserved.
    
    Oracle is a registered trademark of Oracle Corporation and/or its
    affiliates. Other names may be trademarks of their respective
    owners.
    
    Type 'help;' or '\h' for help. Type '\c' to clear the current input statement.
    
    mysql> show databases ;
    +--------------------+
    | Database           |
    +--------------------+
    | information_schema |
    | mysql              |
    | performance_schema |
    | sys                |
    +--------------------+
    4 rows in set (0.01 sec)
    
    mysql>


    补充内容

    ??实际上这种免安装模式是将MySQL注册为Windows的一个服务了,通过查看服务列表我们能发现这个MySQL服务,也可以控制服务的启动方式、运行状态等等。

    怎么卸载?

    • 首先要停止当前正在运行的服务,然后删除mysql目录
    • 然后打开注册表编辑器(regedit),找到并清除以下项:

    HKEY_LOCAL_MACHINE/SYSTEM/ControlSet001/Services/Eventlog/Application/MySQLD Service
    HKEY_LOCAL_MACHINE/SYSTEM/CurrentControlSet/Services/Eventlog/Application/MySQLD Service

    • 最后需要删除已注册到系统中的MySQL服务
    C:\Windows\system32>sc delete MySQL
    [SC] DeleteService 成功
    
    C:\Windows\system32>
    

    小葵花补充知识点

    关于密码规则

    ??MySQL的密码设置有不同的规则等级,具体说来是跟validate_password_policy这个配置相关的(默认是1,即MEDIUM,所以刚开始设置的密码必须符合长度,且必须含有数字,小写或大写字母,特殊字符。):

    Policy Tests Performed
    0 or LOW Length
    1 or MEDIUM Length; numeric, lowercase/uppercase, and special characters
    2 or STRONG Length; numeric, lowercase/uppercase, and special characters; dictionary file

    忘记密码了怎么办?

    ??有时长时间不用某服务器了,猛地有一天想去看看数据却发现密码忘了,很是尴尬吧?这时候就需要用到了skip-grant-tables 这个配置了,在my.cnf中将这个配置项打开然后restart一下服务,就可以不用校验密码登录mysql服务器了,登录进去之后再给自己的root重新设置一下密码update mysql.user set authentication_string=password('Smart@123') where user='root' ;,大功告成!

    [root@mserver0002 img]# cat /etc/my.cnf
    [mysqld]
    ####basic settings####
    #skip-grant-tables
    default-storage-engine=INNODB
    ......
    
    # 修改完配置文件后可以使用空密码登录(在Enter password:出现后直接敲enter键)
    [root@ecs-ce5a-0001 etc]# mysql -uroot -p
    Enter password: 
    Welcome to the MySQL monitor.  Commands end with ; or \g.
    ......
    
    mysql> use mysql
    
    Database changed
    mysql> SET PASSWORD = PASSWORD('Smart@123');
    ERROR 1290 (HY000): The MySQL server is running with the --skip-grant-tables option so it cannot execute this statement
    mysql> ALTER USER 'root'@'localhost' IDENTIFIED BY 'Smart@123';
    ERROR 1290 (HY000): The MySQL server is running with the --skip-grant-tables option so it cannot execute this statement
    mysql> update mysql.user set password=password('Smart@123') where user= 'root';
    ERROR 1054 (42S22): Unknown column 'password' in 'field list'
    mysql> desc mysql.user
        -> ;
    +------------------------+-----------------------------------+------+-----+-----------------------+-------+
    | Field                  | Type                              | Null | Key | Default               | Extra |
    +------------------------+-----------------------------------+------+-----+-----------------------+-------+
    | Host                   | char(60)                          | NO   | PRI |                       |       |
    ......
    | authentication_string  | text                              | YES  |     | NULL                  |       |
    | password_expired       | enum('N','Y')                     | NO   |     | N                     |       |
    | password_last_changed  | timestamp                         | YES  |     | NULL                  |       |
    | password_lifetime      | smallint(5) unsigned              | YES  |     | NULL                  |       |
    | account_locked         | enum('N','Y')                     | NO   |     | N                     |       |
    +------------------------+-----------------------------------+------+-----+-----------------------+-------+
    45 rows in set (0.00 sec)
    
    mysql> update mysql.user set authentication_string=password('Smart@123') where user= 'root';
    Query OK, 1 row affected, 1 warning (0.00 sec)
    Rows matched: 1  Changed: 1  Warnings: 1
    
    mysql> FLUSH PRIVILEGES;
    Query OK, 0 rows affected (0.01 sec)
    
    mysql> exit
    Bye
    [root@ecs-ce5a-0001 etc]# mysql -uroot -p
    # 在这里输入新设置的密码Smart@123
    Enter password: 
    Welcome to the MySQL monitor.  Commands end with ; or \g.
    ......
    
    mysql> 
    

    关于赋权的说明

    ??首先说说改密码,其实有下面两种途径都可以;而赋权则会涉及的比较多,可以参考下面的操作样例(关于用户权限管理,这么小小的一段是说不清楚的,后面会单独开新的章节进行详细说明):

    ALTER USER 'root'@'localhost' IDENTIFIED BY 'Smart@123';
    flush privileges;
    
    SET PASSWORD = PASSWORD('Smart@123');
    ALTER USER 'root'@'localhost' PASSWORD EXPIRE NEVER;
    flush privileges;
    
    -- root全部赋权
    grant all privileges on *.* to root@"%" identified by "Smart@123";
    flush privileges;
    
    -- 普通用户部分赋权
    grant select,insert,update,delete on db_test.* to test@"%" identified by "Smart@2018";
    flush privileges;
    

    查看MySQL版本

    ??有时候难免会有需要查看MySQL版本的需求(比如做库同步时要查看两个服务的版本是不是一致能不能同步之类的),下面提供了4中常用的数据库版本查看的方法:

    # 方法1
    [root@ecs-ce5a-0001 ~]# mysql -V
    mysql  Ver 14.14 Distrib 5.7.24, for Linux (x86_64) using  EditLine wrapper
    
    # 方法2
    [root@ecs-ce5a-0001 ~]# mysql --help |grep Distrib
    mysql  Ver 14.14 Distrib 5.7.24, for Linux (x86_64) using  EditLine wrapper
    
    # 方法3
    [root@ecs-ce5a-0001 ~]# mysql -uroot -pKoncendy@123
    mysql: [Warning] Using a password on the command line interface can be insecure.
    Welcome to the MySQL monitor.  Commands end with ; or \g.
    Your MySQL connection id is 12
    Server version: 5.7.24-log MySQL Community Server (GPL)
    
    Copyright (c) 2000, 2018, Oracle and/or its affiliates. All rights reserved.
    
    Oracle is a registered trademark of Oracle Corporation and/or its
    affiliates. Other names may be trademarks of their respective
    owners.
    
    Type 'help;' or '\h' for help. Type '\c' to clear the current input statement.
    
    mysql>  select version();
    +------------+
    | version()  |
    +------------+
    | 5.7.24-log |
    +------------+
    1 row in set (0.00 sec)
    
    # 方法4
    mysql> status
    --------------
    mysql  Ver 14.14 Distrib 5.7.24, for Linux (x86_64) using  EditLine wrapper
    
    Connection id:		12
    Current database:	
    Current user:		root@
    SSL:			Not in use
    Current pager:		stdout
    Using outfile:		''
    Using delimiter:	;
    Server version:		5.7.24-log MySQL Community Server (GPL)
    Protocol version:	10
    Connection:		Localhost via UNIX socket
    Server characterset:	utf8
    Db     characterset:	utf8
    Client characterset:	utf8
    Conn.  characterset:	utf8
    UNIX socket:		/data/mysql/mysql.sock
    Uptime:			5 min 21 sec
    
    Threads: 6  Questions: 293  Slow queries: 6  Opens: 195  Flush tables: 1  Open tables: 156  Queries per second avg: 0.912
    --------------
    
    mysql> 
    

    常见的错误

    远程无法访问

    ??通常情况下,有两个可能性比较大的原因:

    • bind-address没设置对,端口绑定到127.0.0.1上面去了
    • 云服务器的3306端口没有做安全组规则开放(这个在本地服务器安装不会出现)

    目录初始化问题

    ??启动时失败通过journalctl -xe查看发现如下的错入日志,一般出现这个错误表示my.cnf里指定的datadir不是一个空目录(有垃圾文件或者有之前初始化残留的文件);已经初始化,但没有成功,想再次初始化报错;这时需要清理这个目录之后重新尝试启动服务。

    ...: 2018-11-14T13:43:11.806347+08:00 0 [ERROR] --initialize specified but the data directory has files in it. Aborting.

    日志权限的问题

    ??启动时失败通过journalctl -xe查看发现如下的错入日志,实际上就是写日志文件没有权限导致的错误。但是我在执行了[root@ecs-ce5a-0001 etc]# chmod -R 766 /var/log/mysql之后发现启动服务后还是会报下面的错误,很奇怪(因为766已经对应的是-rwxrw-rw-这个权限级别,可以读写了);后来将766调整为777才可以正常启动服务。(没完全弄明白为什么对日志目录要执行权限?)

    ...: 2018-11-14T13:44:17.230008+08:00 0 [ERROR] Could not open file '/var/log/mysql/error.log' for error logging: Permission denied

    MSVCP140.dll缺失

    ??windows下出现的,在dos窗口运行mysqld --initialize-insecure,这时出现如下提示:

    ---------------------------
    mysqld.exe - 系统错误
    ---------------------------
    无法启动此程序,因为计算机中丢失 MSVCP140.dll。尝试重新安装该程序以解决此问题。 
    ---------------------------
    确定   
    ---------------------------
    

    ??实际上这个问题是因为没有安装VC++2015版运行库导致的(Microsoft Visual C++ 2015 Redistributable),到如下下载地址 https://www.microsoft.com/en-us/download/details.aspx?id=53587 ,按照本机操作系统的位数确定下载的包,安装后即可解决此问题。

    客户端连接MySQL 8报1251

    ??通过SQLyog或者Navicat连接MySQL发现报1251如下错误提示:

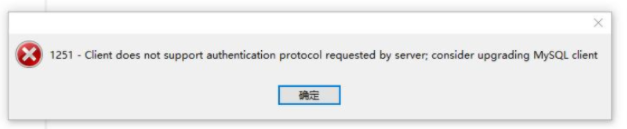
    ??百度了一下,原因是mysql8之前的版本中加密规则是mysql_native_password,在mysql8之后加密规则改成了caching_sha2_password;解决的方法有两种,一种是升级客户端驱动,一种是把mysql用户登录密码加密规则还原成mysql_native_password;因为咱们大多数都是自己想办法搞得客户端,所以就选择第二条路了;操作如下:

    # Login
    mysqladmin -u root -p 
    ......
    
    # Execute SQL
    ALTER USER 'root'@'localhost' IDENTIFIED BY 'password' PASSWORD EXPIRE NEVER;
    ALTER USER 'root'@'localhost' IDENTIFIED WITH mysql_native_password BY 'admin123';
    FLUSH PRIVILEGES;
    
    bk