������˵����
1���ܶ������,��˾����������һ�㶼������,�������������Linux����,һ�㶼����ֱ�����߰�װnginx�ȹ��ߵ�,��ʱ�Ϳ���ͨ��rpm��װ���������߰�װ�����á�
2����װnginxһ�㽨��ʹ��root�û�����һ����Ӧ��nginx��ͨ�û������nginx�������ĺ�����ά����~
Linux�����û����Բο��ҵ���ƪ����https://blog.csdn.net/JustinQin/article/details/101677631
һ����װnginx
1.1 ��Դ��
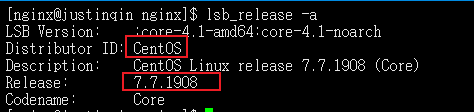
- �鿴ϵͳ�汾
lsb_release -a
���Կ���������IJ���ϵͳ��Linux Centos 7.7
- �ٷ�����rpm��װ��
- �������ϵͳ��ʵ���������ѡ��,���ص�ַ http://nginx.org/packages/
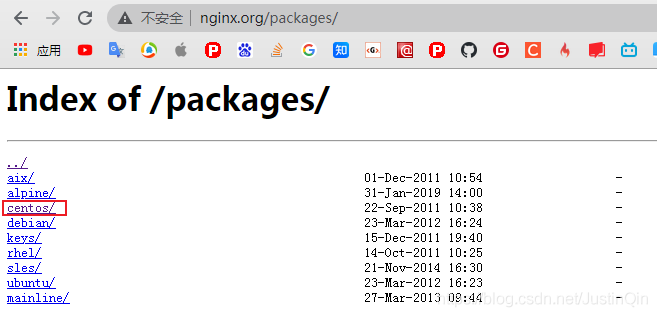
- ������ʹ�õ���Linux CentOS 7�������ȶ��汾
nginx-1.20.1-1.el7.ngx.x86_64.rpm http://nginx.org/packages/centos/7/x86_64/RPMS/ - ����汾��Ҫ����ʵ�ʽ���ѡ��,ֻҪȷ������ʹ�õ���
�ȶ��汾����

- �ϴ���װ��
- ʹ����ͨ�û�
nginx�ϴ���װ��������·��:/usr/nginx/
������·��Ϊ/usr/nginx/nginx-1.20.1-1.el7.ngx.x86_64.rpm - ��ʵ����Ҫ������Ӧ·��,������
nginx�û���Ȩ��Ŀ¼�´���,���û��nginx�û�,������������root�û�����nginx�û��� - Linux�����û����Բο��ҵ���ƪ���� Linux�C�û����û�������ij�������
1.2 ��黷��
cd /usr/nginx
rpm -ivh --test nginx-1.20.1-1.el7.ngx.x86_64.rpm
--test��ʾ����鰲װ������ʵ�ʰ�װ,������,��ʾ����ͼ:

1.3 ��װ�����
- �״ΰ�װnginx,��Ҫʹ��
root�û����а�װ�����Ȳ�����,�������Ȩ��nginx�û�,ֱ��ʹ��nginx����������ͨ�û���װ,һ�����ʾ��Ȩ��,����:

- ��װnginx(
root�û�)
cd /usr/nginx/
rpm -ivh nginx-1.20.1-1.el7.ngx.x86_64.rpm
rpm -qa | grep nginx

��������nginx
2.1 ����Ȩ��
- nginx��rpm��װ��,��ʵ����һ���ܶ��ļ���ѹ����,ʹ��
root�û���װ��,��ЩĿ¼���ļ��ܶ��rootȨ��,��Ҫ������Ȩ��nginx������ͨ�û��� - �鿴
rpm��װ���б��嵥
rpm -qpl nginx-1.20.1-1.el7.ngx.x86_64.rpm
- �����б��嵥��Ȩ��
nginx�û�
��Ȩ��ʽ:chown -R �û���:�û����� ��Դ·��
chown -R nginx:nginx /etc/logrotate.d/nginx
chown -R nginx:nginx /etc/nginx
chown -R nginx:nginx /etc/nginx/conf.d
chown -R nginx:nginx /etc/nginx/conf.d/default.conf
chown -R nginx:nginx /etc/nginx/fastcgi_params
chown -R nginx:nginx /etc/nginx/mime.types
chown -R nginx:nginx /etc/nginx/modules
chown -R nginx:nginx /etc/nginx/nginx.conf
chown -R nginx:nginx /etc/nginx/scgi_params
chown -R nginx:nginx /etc/nginx/uwsgi_params
chown -R nginx:nginx /usr/lib/systemd/system/nginx-debug.service
chown -R nginx:nginx /usr/lib/systemd/system/nginx.service
chown -R nginx:nginx /usr/lib64/nginx
chown -R nginx:nginx /usr/lib64/nginx/modules
chown -R nginx:nginx /usr/libexec/initscripts/legacy-actions/nginx
chown -R nginx:nginx /usr/libexec/initscripts/legacy-actions/nginx/check-reload
chown -R nginx:nginx /usr/libexec/initscripts/legacy-actions/nginx/upgrade
chown -R nginx:nginx /usr/sbin/nginx
chown -R nginx:nginx /usr/sbin/nginx-debug
chown -R nginx:nginx /usr/share/doc/nginx-1.20.1
chown -R nginx:nginx /usr/share/doc/nginx-1.20.1/COPYRIGHT
chown -R nginx:nginx /usr/share/man/man8/nginx.8.gz
chown -R nginx:nginx /usr/share/nginx
chown -R nginx:nginx /usr/share/nginx/html
chown -R nginx:nginx /usr/share/nginx/html/50x.html
chown -R nginx:nginx /usr/share/nginx/html/index.html
chown -R nginx:nginx /var/cache/nginx
chown -R nginx:nginx /var/log/nginx
2.2 Ŀ¼���
- ʹ��
root�û�����rpm��װ����װ��ɺ�,�л�nginx�û� - Ϊ�˷��������
��־�����Լ������IJ���ǰ�˾�̬��Դ,�������¹滮��־Ŀ¼����̬��ԴĿ¼ - ����
��־Ŀ¼����̬��ԴĿ¼
mkdir -p /usr/nginx/logs/nginx
mkdir -p /usr/nginx/nginx/html
- ��rpm��װ����ʼ����nginx��ӭҳ��,��������̬��Դ·����
cp /usr/share/nginx/html/50x.html /usr/nginx/nginx/html/50x.html
cp /usr/share/nginx/html/index.html /usr/nginx/nginx/html/index.html
2.3 ��ҪĿ¼˵��
-
/etc/nginx nginxĬ�������ļ���Ŀ¼
nginx.conf nginx�������ļ�,�ļ�����������Զ�����conf.d��*.conf������
-
/etc/nginx/conf.d nginx��*.conf��������ô��Ŀ¼
default.conf nginx�������ļ�,��Ҫ�����˿ڶ˿�����־�����ؾ�����������������á�
-
/usr/sbin/nginx ��ִ�ж������ļ�,nginx����ͣ��ִ������ǰ
-
/usr/share/nginx/html ��̬��ԴĿ¼
���������Ѿ���Ϊ/usr/nginx/nginx/html
-
/var/log/nginx ��־�ļ����Ŀ¼
���������Ѿ���Ϊ/usr/nginx/logs/nginx
2.4 ����default.conf
- ��nginx�����˿�,������
10080�˿�Ϊ��,����˿ڸ���ʵ����Ŀ��Ҫ�����ġ� - ����
10080.conf
cd /etc/nginx/conf.d
cp default.conf default.conf.bak
mv default.conf 10080.conf
- ��
10080.conf
��Ҫ�Ķ�Ӧ���˿ں�����־·������̬��Դ·��,���½�ͼ:

10080.conf�������������:
server {
listen 10080;
server_name localhost;
access_log /usr/nginx/logs/nginx/host.access.log main;
location / {
root /usr/nginx/nginx/html;
index index.html index.htm;
}
error_page 500 502 503 504 /50x.html;
location = /50x.html {
root /usr/nginx/nginx/html;
}
}
2.5 ����nginx.conf
cd /etc/nginx/
cp nginx.conf nginx.conf.bak
- ��
nginx.conf
ͬ����Ҫ����־·����nginx�����ļ�,���½�ͼ:
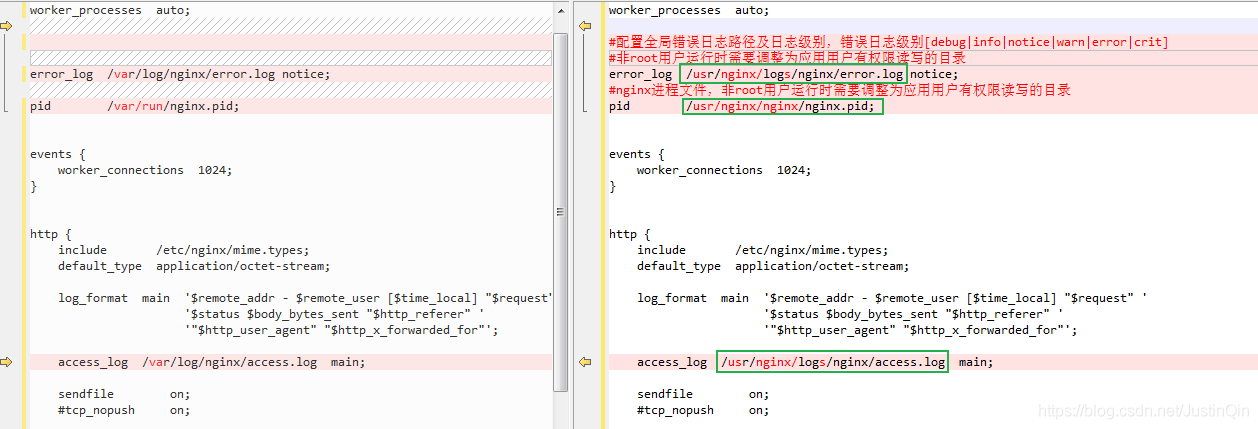
nginx.conf�������������:
user nginx;
worker_processes auto;
error_log /usr/nginx/logs/nginx/error.log notice;
pid /usr/nginx/nginx/nginx.pid;
events {
worker_connections 1024;
}
http {
include /etc/nginx/mime.types;
default_type application/octet-stream;
log_format main '$remote_addr - $remote_user [$time_local] "$request" '
'$status $body_bytes_sent "$http_referer" '
'"$http_user_agent" "$http_x_forwarded_for"';
access_log /usr/nginx/logs/nginx/access.log main;
sendfile on;
keepalive_timeout 65;
include /etc/nginx/conf.d/*.conf;
}
2.6 ����nginx
-
�鿴nginx���н��� ps -ef|grep nginx
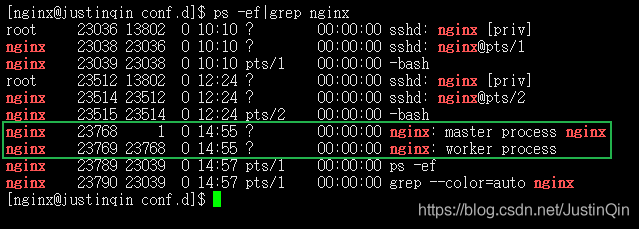
����nginx�������,����nginx��������������~
-
���nginx�Ѿ���������״̬,��ô����Ҫ����nginx,ֻ��Ҫˢ��nginx���ü���,ˢ������ǰ�ȼ����nginx�����Ƿ���ȷ,������� nginx -t,������ȷ��ˢ��nginx����,ˢ������ nginx -s reload
-
���nginx����δ����״̬,�ȼ����nginx�����Ƿ���ȷ,������� nginx -t,������ȷ��ֱ������nginx,��������Ϊ nginx��/usr/sbin/nginx
�C˵��:
��ͨ�û�nginx,����nginxʱ,���ܻ���ʾ���¾�����Ϣ:
nginx:[warn] ***
��ʾnginx: master process������ֻ�ܶԳ����û�root��Ч��root����nginxʱ��Ч,��
���治Ӱ��nginx������ʹ�á�
-
nginx������������
nginx -s stop ֹͣ nginx
nginx -s reload ˢ��nginx����(������nginx�������,���¼�������nginx�����ļ�)
nginx -s reopen �¿�nginx��־(�������������,��access.log����־�ļ�������ʱ�������ɶ�Ӧ��־�ļ�)
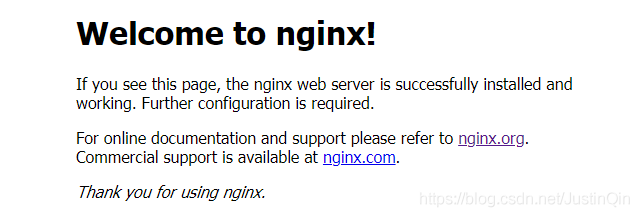
2.7 ����nginx
cp /usr/share/nginx/html/50x.html /usr/nginx/nginx/html/50x.html
cp /usr/share/nginx/html/index.html /usr/nginx/nginx/html/index.html
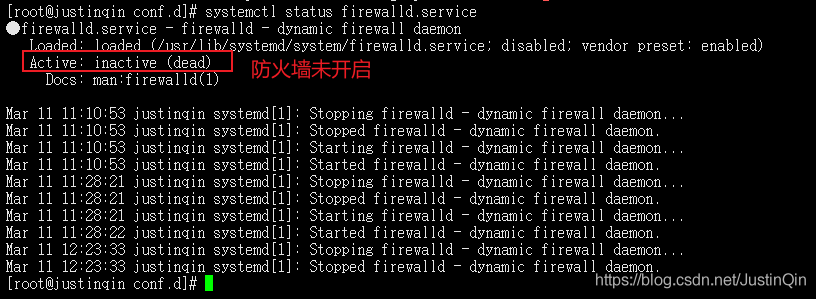
- ���nginx��������,html��ӭҳ��Ҳ����,���Ƿ��ʼ��س�ʱ,�����������Ҫ������ķ������ķ���ǽ״̬,������Linux�ķ���ǽ��ǰ���ڿ���״̬,���Ƿ���ǽδ����
�����˿ں��˿�,����Ҫʹ��root���������˿ں���,����������ǽ,�����·���~
2.8 ������ǽ
-
���ڷ���ǽ�ļ��,�������ʵ�������������,�������ǽ����δ����,Ҳ����Ӱ��nginx�ķ���
-
����������Linux���������˷���ǽ,Ҫȷ��nginx��������ض˿ں�,Ҫ�����ӵ�����ǽ��,�ſ�����������nginx��
-
����ʹ��root�û�����,�ſ�nginx��tcp/10080�˿ں�
-
�鿴����ǽ����״̬
systemctl status firewalld.service
-
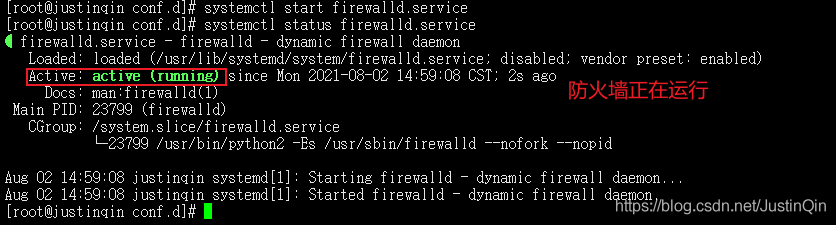
��������ǽ
systemctl start firewalld.service
-
�鿴����ǽ�ѷſ��˿��б�
firewall-cmd --permanent --zone=public --list-ports
-
�ſ�10080/tcp�˿�
firewall-cmd --permanent --zone=public --add-port=10080/tcp
-
�ٴβ鿴�˿�
firewall-cmd --permanent --zone=public --list-ports
-
��������ǽ
systemctl restart firewalld.service
-
��������ǽ��������
ɾ������ǽָ���˿�firewall-cmd --permanent --zone=public --remove-port=10080/tcp
��¼
** ��;�������������� **
-
Ȩ������?
��ʹ��nginx�û�����nginxʱ,��ʾȨ������,��ʹ��root�û����²���������Ȩ�ޡ� �½ڵ�chown��Ȩ��nginx�û���
-
default.conf��������
Ҫ��ϸ���nginx��/etc/nginx.conf��/etc/nginx/conf.d/default.conf������Ҫ������Ϣ
����,�ҵ�ʱ�ʹ���nginx.conf�����ݿ�����10080.conf����,��nginx -t����ʱ����ʾ��������:
nginx: [warn] the ��user�� directive makes sense only if the master process runs with super-user privileges, ignored in /etc/nginx/nginx.conf:1
nginx: [emerg] "user" directive is not allowed here in /etc/nginx/conf.d/10080.conf:1
nginx: configuration file /etc/nginx/nginx.conf test failed
cs