<template>
<swiper class="home-swiper" :current="activeIndex" @change="change">
<swiper-item v-for="(item,index) in tab" class="swiper-item" :key="index">
<list-item :list="listCatchData[index]"></list-item>
</swiper-item>
</swiper>
</template>
<script>
import listItem from './list-item.vue'
export default {
components:{
listItem
},
props:{
tab:{
type:Array,
default(){
return []
}
},
activeIndex:{
type:Number,
default:0
}
},
data() {
return {
list:[],
listCatchData:{}
};
},
created() {
// this.get_list(0)
},
watch:{
tab(newVal){
if(newVal.length===0) return
this.get_list(this.activeIndex)
}
},
methods:{
change(e){
const {current}=e.detail
this.$emit('change',current)
this.get_list(current)
},
get_list(current){
this.$api.get_list({
name:this.tab[current].name
})
.then(res=>{
// this.list=res.data.data
// this.listCatchData[current]=res.data.data
this.$set(this.listCatchData,current,res.data.data)
})
}
}
}
</script>
<style lang="scss">
.home-swiper {
height: 100%;
.swiper-item{
height: 100%;
overflow: hidden;
	.list-scrool{
		height: 100%;
	}
}
}
</style>
我们将tab选项卡添加一个数据’全部’
pages/index.vue/index.vue

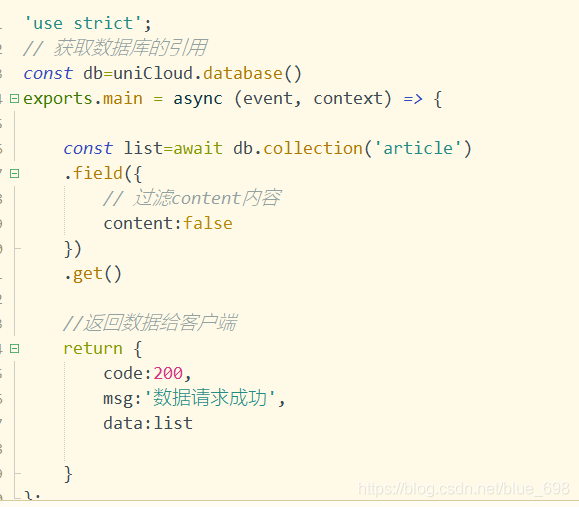
云函数get_list


我们在list组件的change事件中添加如下代码
否则会多次请求数据库,会造成服务器压力

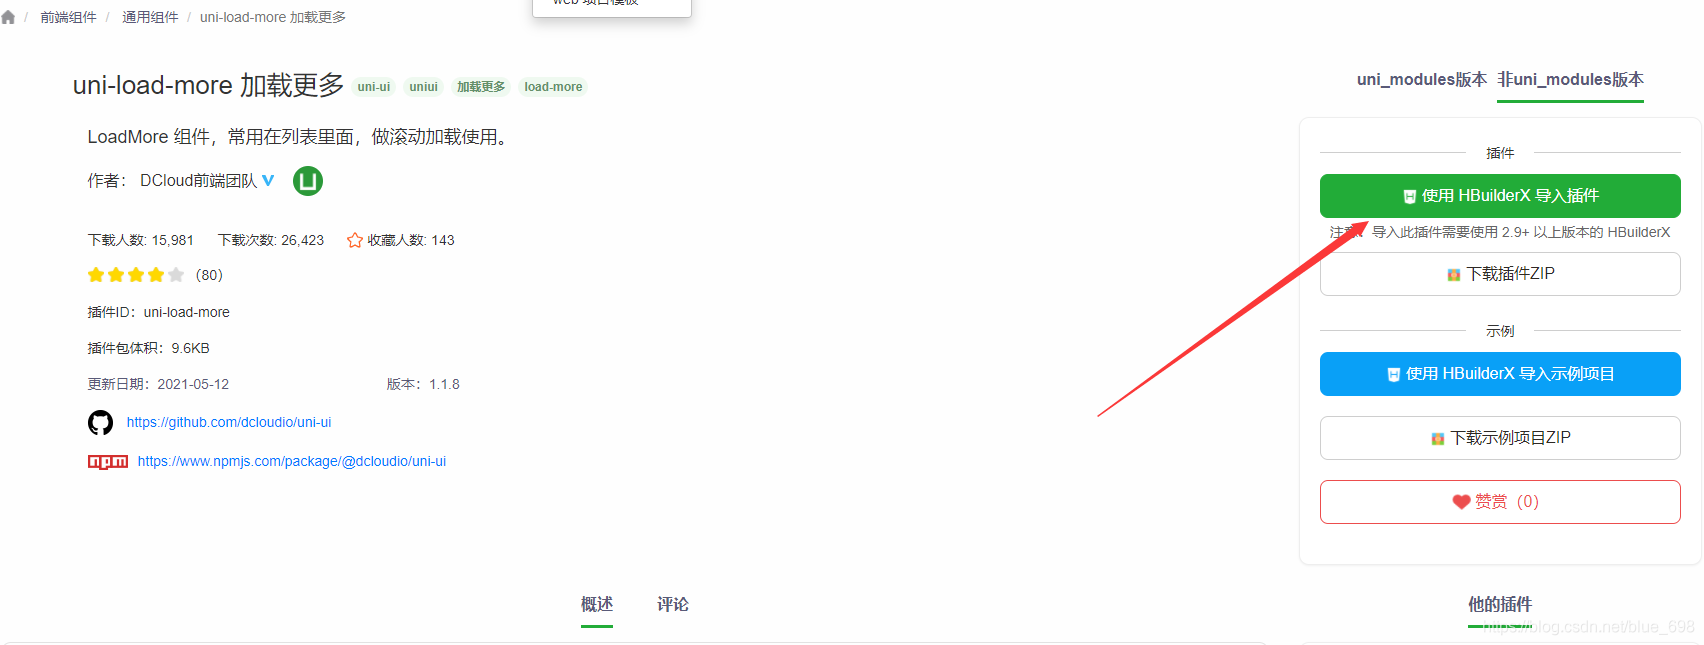
引入加载插件
插件市场导入
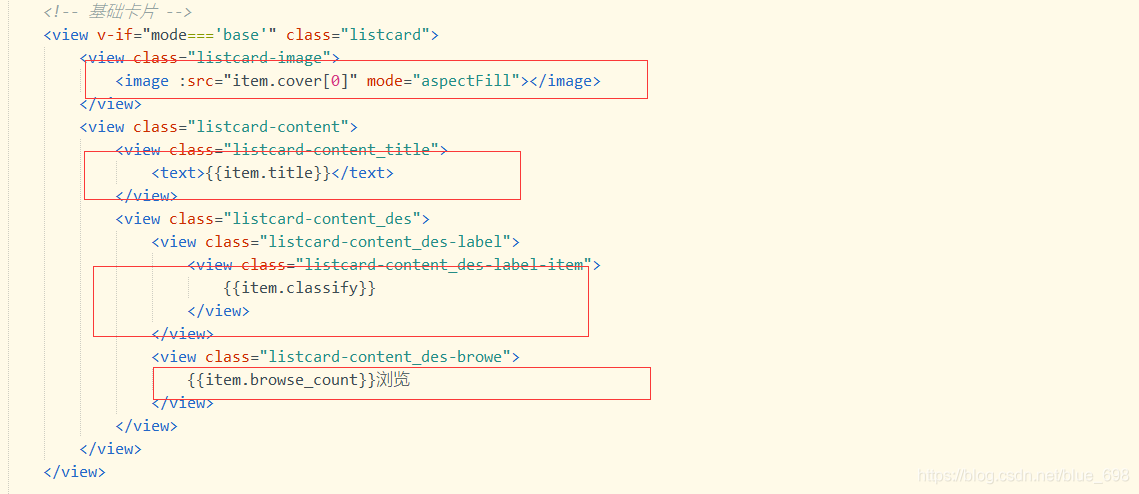
list-item中使用

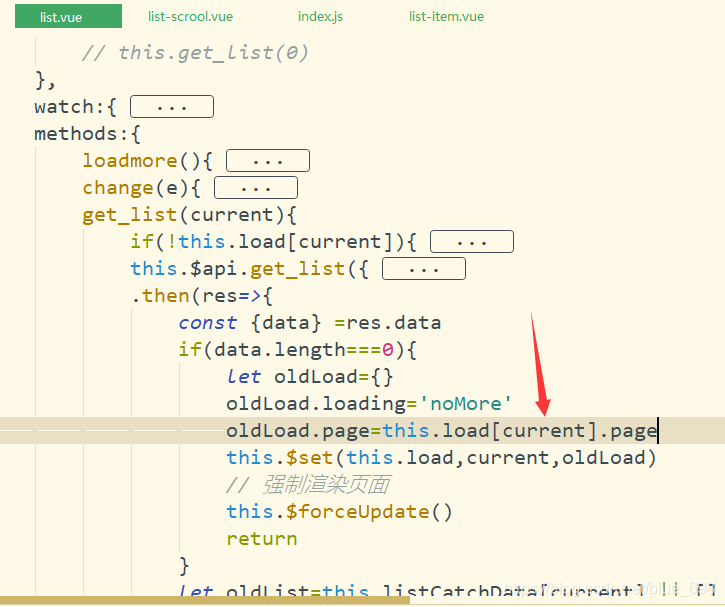
这里会有一个问题,在最下面会一直存在加载中,所以我们要做判断
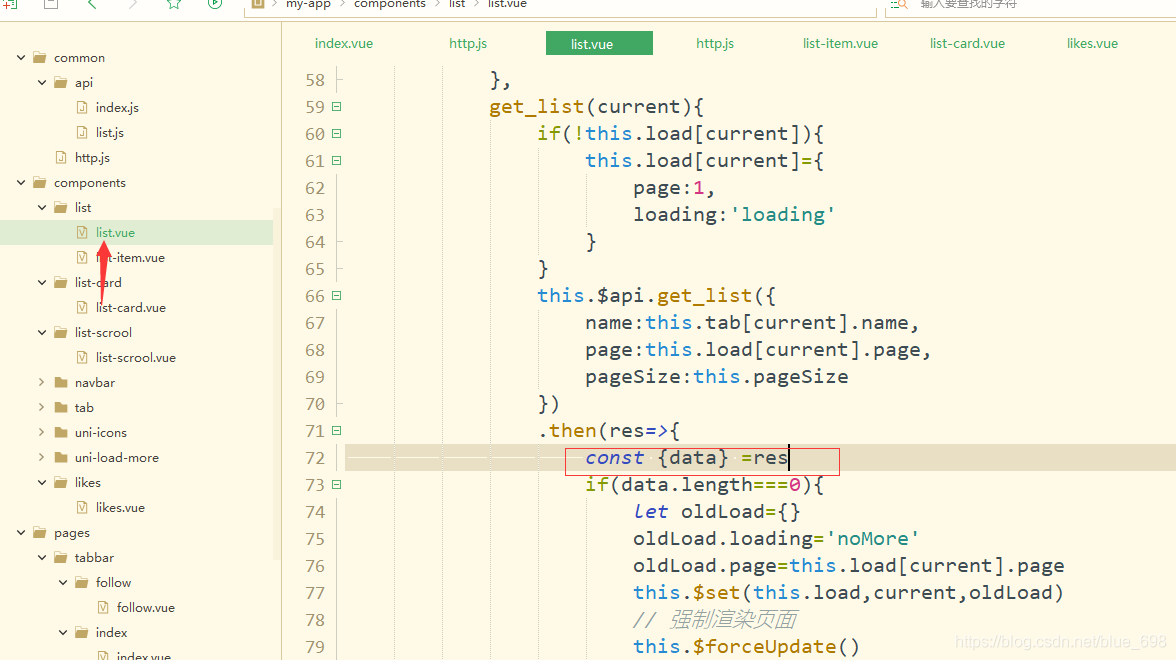
我们在获取列表数据里面加入俩个条件
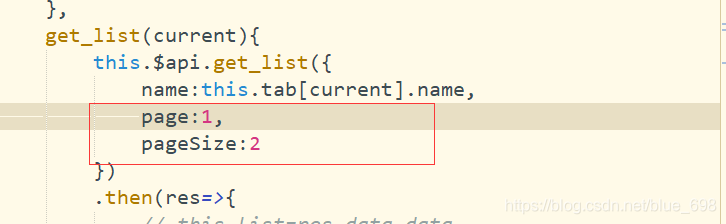
在get_list中加入下面代码
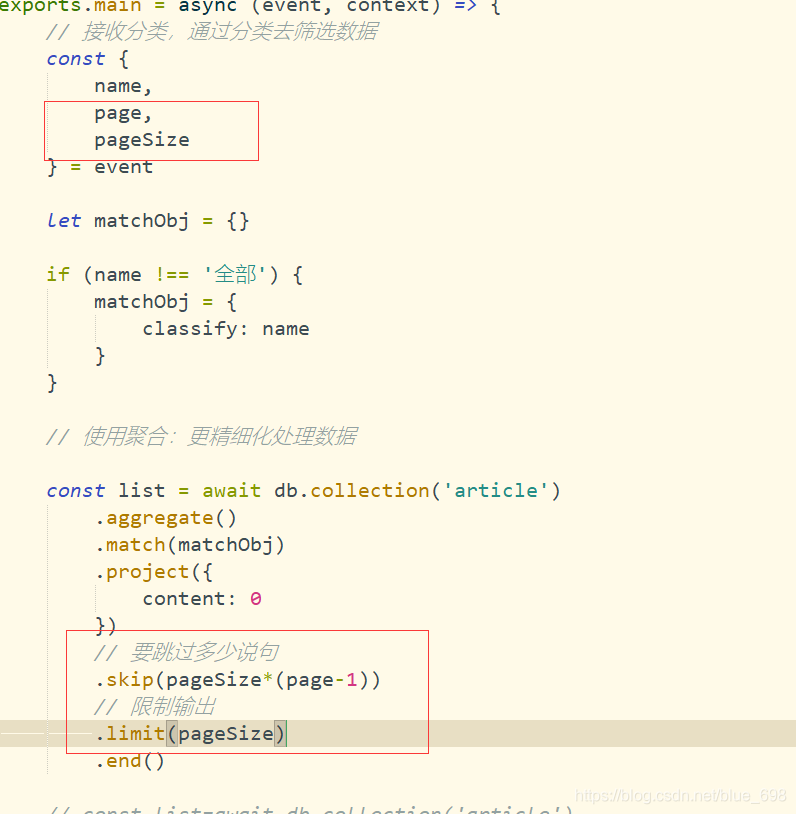
这样就可以获取每页多少条,我们后面去做判断,划到最后是显示正在加载还是没有更多数据提升
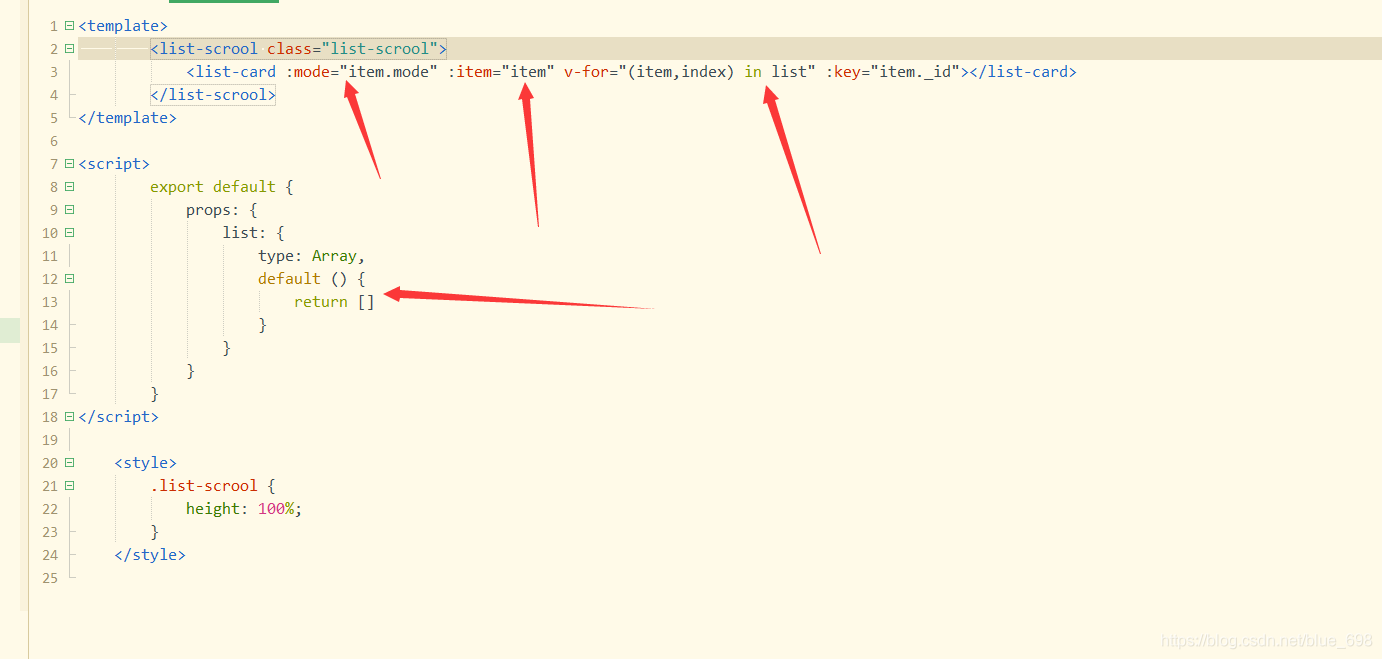
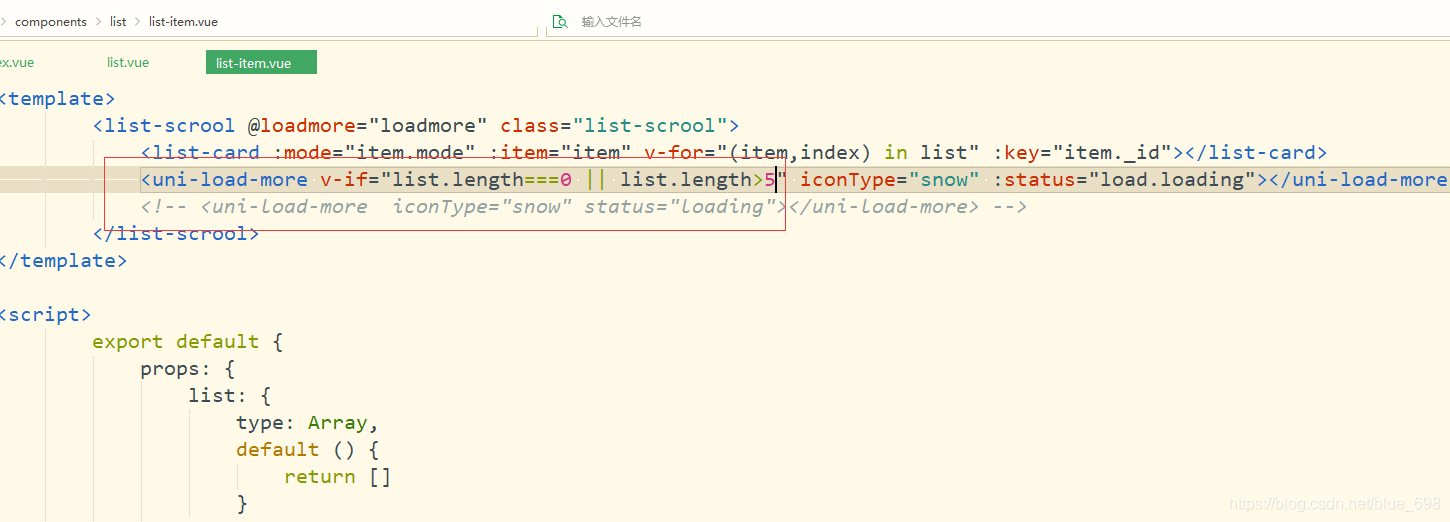
我们用的list-scrool组件

在list-scrool组件中添加上划到底事件

我们从组件一级一级传出事件到list组件中


我们在这几处加入代码,为了下滑到底加载更多数据

这时有一个问题,如果我们在全部页下滑加载完全部数据,划到单独分栏不会加载数据的
我们将page变量删除改为load:{} 即可完美解决

加入如下代码在list组件

然后在list-item组件中接收即可

再往下划会报错

加入如下代码,就完美解决了

最后这样如果数据库没有新数据就不会再次发起请求了
别的页面也能正常运行了

我们做一个小小修改,加入一行代码在index.vue

加入一行代码在list-item.vue中
这样我们就完美解决了
收藏功能
新建likes组件
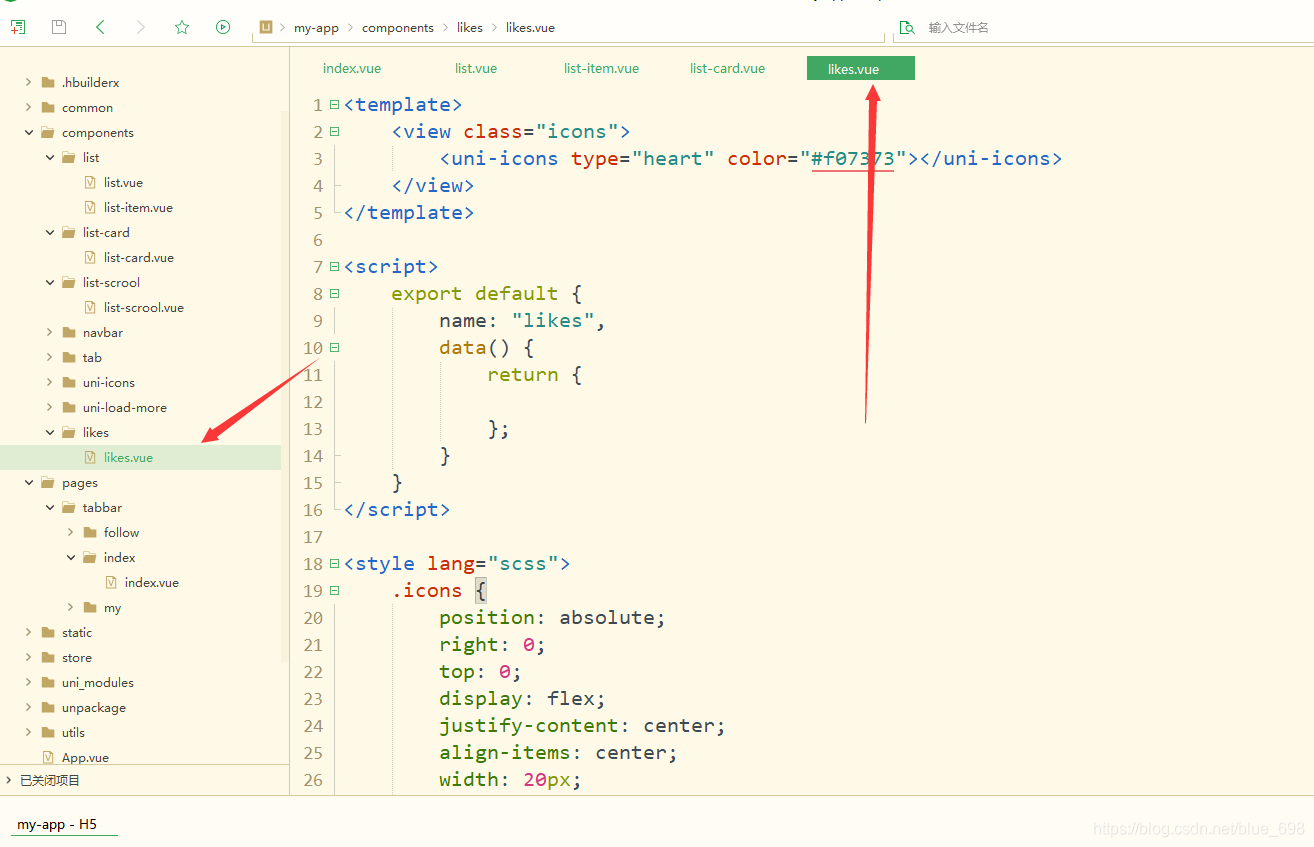
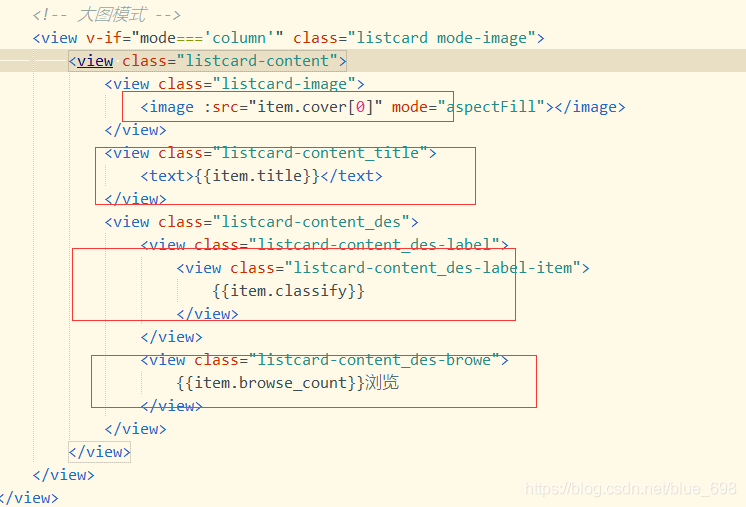
然后再list-card中每个模式标题下面引入

再likes中做点击事件

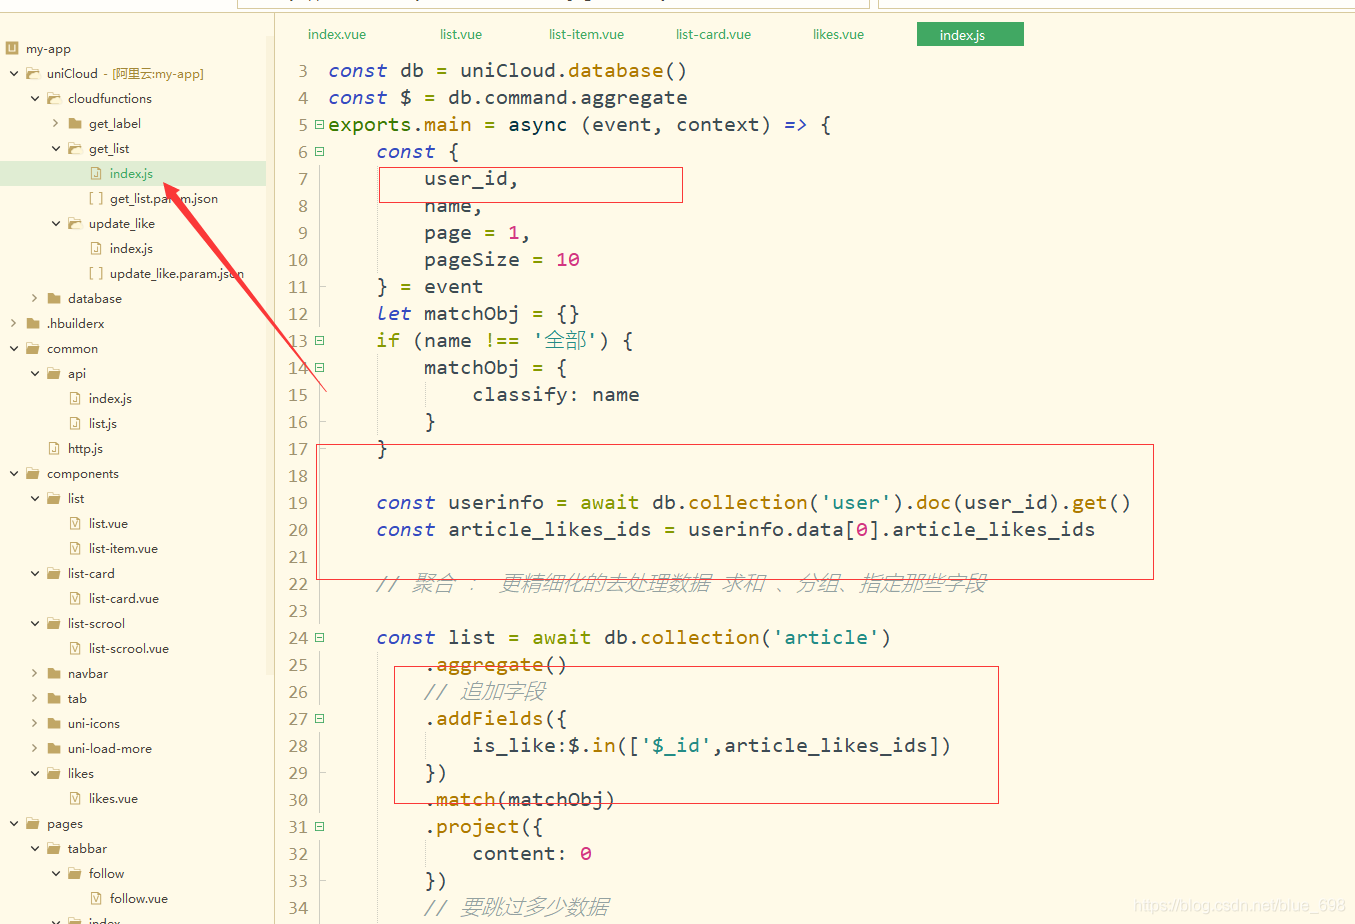
编写新的云函数

api中加入

likes组件中加入传值

然后我们在likes.vue组件中进行接收
在点击收藏时我们直接调用我们的函数,我们也写了一个变量like,为了让收藏按钮是显示收藏还是为收藏


但是我们收藏状态在刷新后是不存储的
我们要做一下修改


改变文章收藏状态

加个收藏提示,是收藏还是取消

到此我们的收藏就完成了
结束语
到现在我们首页就完成了
敬请期待下一篇: 搜索功能的实现
cs