import torch
import torch.nn as nn
import torch.optim as optim
from torchvision import datasets, transforms
import torchvision
from torch.autograd import Variable
from torch.utils.data import DataLoader
import cv2
# 下载训练集
train_dataset = datasets.MNIST(root='E:\mnist',
train=True,
transform=transforms.ToTensor(),
download=True)
# 下载测试集
test_dataset = datasets.MNIST(root='E:\mnist',
train=False,
transform=transforms.ToTensor(),
download=True)
# dataset 参数用于指定我们载入的数据集名称
# batch_size参数设置了每个包中的图片数据个数
# 在装载的过程会将数据随机打乱顺序并进打包
batch_size = 64
# 建立一个数据迭代器
# 装载训练集
train_loader = torch.utils.data.DataLoader(dataset=train_dataset,
batch_size=batch_size,
shuffle=True)
# 装载测试集
test_loader = torch.utils.data.DataLoader(dataset=test_dataset,
batch_size=batch_size,
shuffle=True)
# 卷积层使用 torch.nn.Conv2d
# 激活层使用 torch.nn.ReLU
# 池化层使用 torch.nn.MaxPool2d
# 全连接层使用 torch.nn.Linear
class LeNet(nn.Module):
def __init__(self):
super(LeNet, self).__init__()
self.conv1 = nn.Sequential(nn.Conv2d(1, 6, 3, 1, 2),
nn.ReLU(), nn.MaxPool2d(2, 2))
self.conv2 = nn.Sequential(nn.Conv2d(6, 16, 5), nn.ReLU(),
nn.MaxPool2d(2, 2))
self.fc1 = nn.Sequential(nn.Linear(16 * 5 * 5, 120),
nn.BatchNorm1d(120), nn.ReLU())
self.fc2 = nn.Sequential(
nn.Linear(120, 84),
nn.BatchNorm1d(84),
nn.ReLU(),
nn.Linear(84, 10))
# 最后的结果一定要变为 10,因为数字的选项是 0 ~ 9
def forward(self, x):
x = self.conv1(x)
# print("1:", x.shape)
# 1: torch.Size([64, 6, 30, 30])
# max pooling
# 1: torch.Size([64, 6, 15, 15])
x = self.conv2(x)
# print("2:", x.shape)
# 2: torch.Size([64, 16, 5, 5])
# 对参数实现扁平化
x = x.view(x.size()[0], -1)
x = self.fc1(x)
x = self.fc2(x)
return x
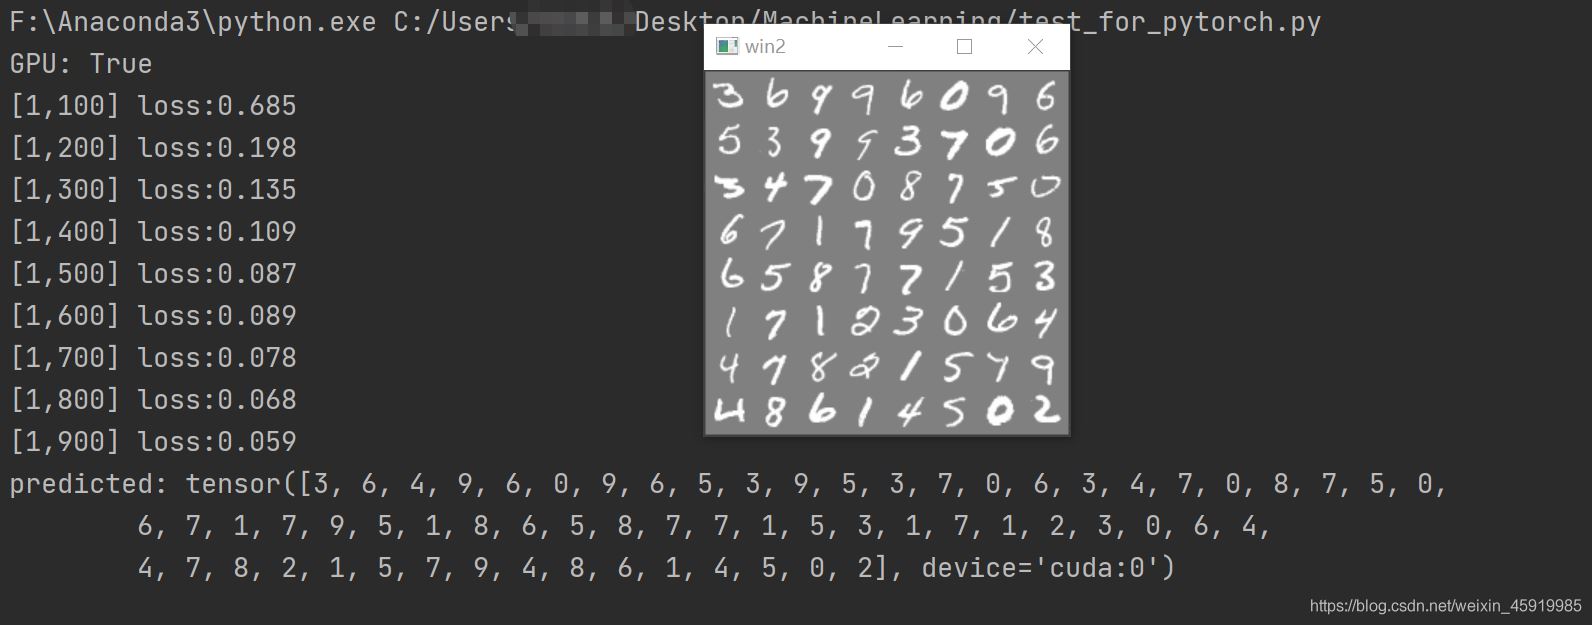
def test_image_data(images, labels):
# 初始输出为一段数字图像序列
# 将一段图像序列整合到一张图片上 (make_grid会默认将图片变成三通道,默认值为0)
# images: torch.Size([64, 1, 28, 28])
img = torchvision.utils.make_grid(images)
# img: torch.Size([3, 242, 242])
# 将通道维度置在第三个维度
img = img.numpy().transpose(1, 2, 0)
# img: torch.Size([242, 242, 3])
# 减小图像对比度
std = [0.5, 0.5, 0.5]
mean = [0.5, 0.5, 0.5]
img = img * std + mean
# print(labels)
cv2.imshow('win2', img)
key_pressed = cv2.waitKey(0)
# 初始化设备信息
device = torch.device('cuda' if torch.cuda.is_available() else 'cpu')
# 学习速率
LR = 0.001
# 初始化网络
net = LeNet().to(device)
# 损失函数使用交叉熵
criterion = nn.CrossEntropyLoss()
# 优化函数使用 Adam 自适应优化算法
optimizer = optim.Adam(net.parameters(), lr=LR, )
epoch = 1
if __name__ == '__main__':
for epoch in range(epoch):
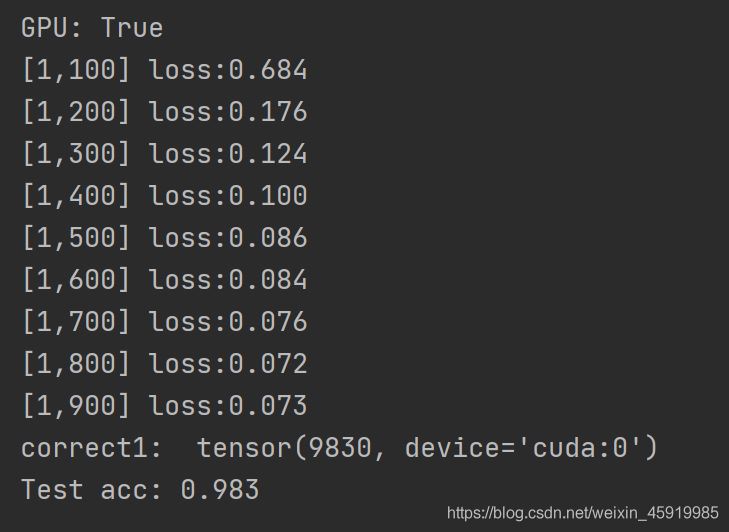
print("GPU:", torch.cuda.is_available())
sum_loss = 0.0
for i, data in enumerate(train_loader):
inputs, labels = data
# print(inputs.shape)
# torch.Size([64, 1, 28, 28])
# 将内存中的数据复制到gpu显存中去
inputs, labels = Variable(inputs).cuda(), Variable(labels).cuda()
# 将梯度归零
optimizer.zero_grad()
# 将数据传入网络进行前向运算
outputs = net(inputs)
# 得到损失函数
loss = criterion(outputs, labels)
# 反向传播
loss.backward()
# 通过梯度做一步参数更新
optimizer.step()
# print(loss)
sum_loss += loss.item()
if i % 100 == 99:
print('[%d,%d] loss:%.03f' % (epoch + 1, i + 1, sum_loss / 100))
sum_loss = 0.0
# 将模型变换为测试模式
net.eval()
correct = 0
total = 0
for data_test in test_loader:
_images, _labels = data_test
# 将内存中的数据复制到gpu显存中去
images, labels = Variable(_images).cuda(), Variable(_labels).cuda()
# 图像预测结果
output_test = net(images)
# torch.Size([64, 10])
# 从每行中找到最大预测索引
_, predicted = torch.max(output_test, 1)
# 图像可视化
# print("predicted:", predicted)
# test_image_data(_images, _labels)
# 预测数据的数量
total += labels.size(0)
# 预测正确的数量
correct += (predicted == labels).sum()
print("correct1: ", correct)
print("Test acc: {0}".format(correct.item() / total))